The Vespa
Role
Restoration mechanic, Industrial design, Welder.
Started with
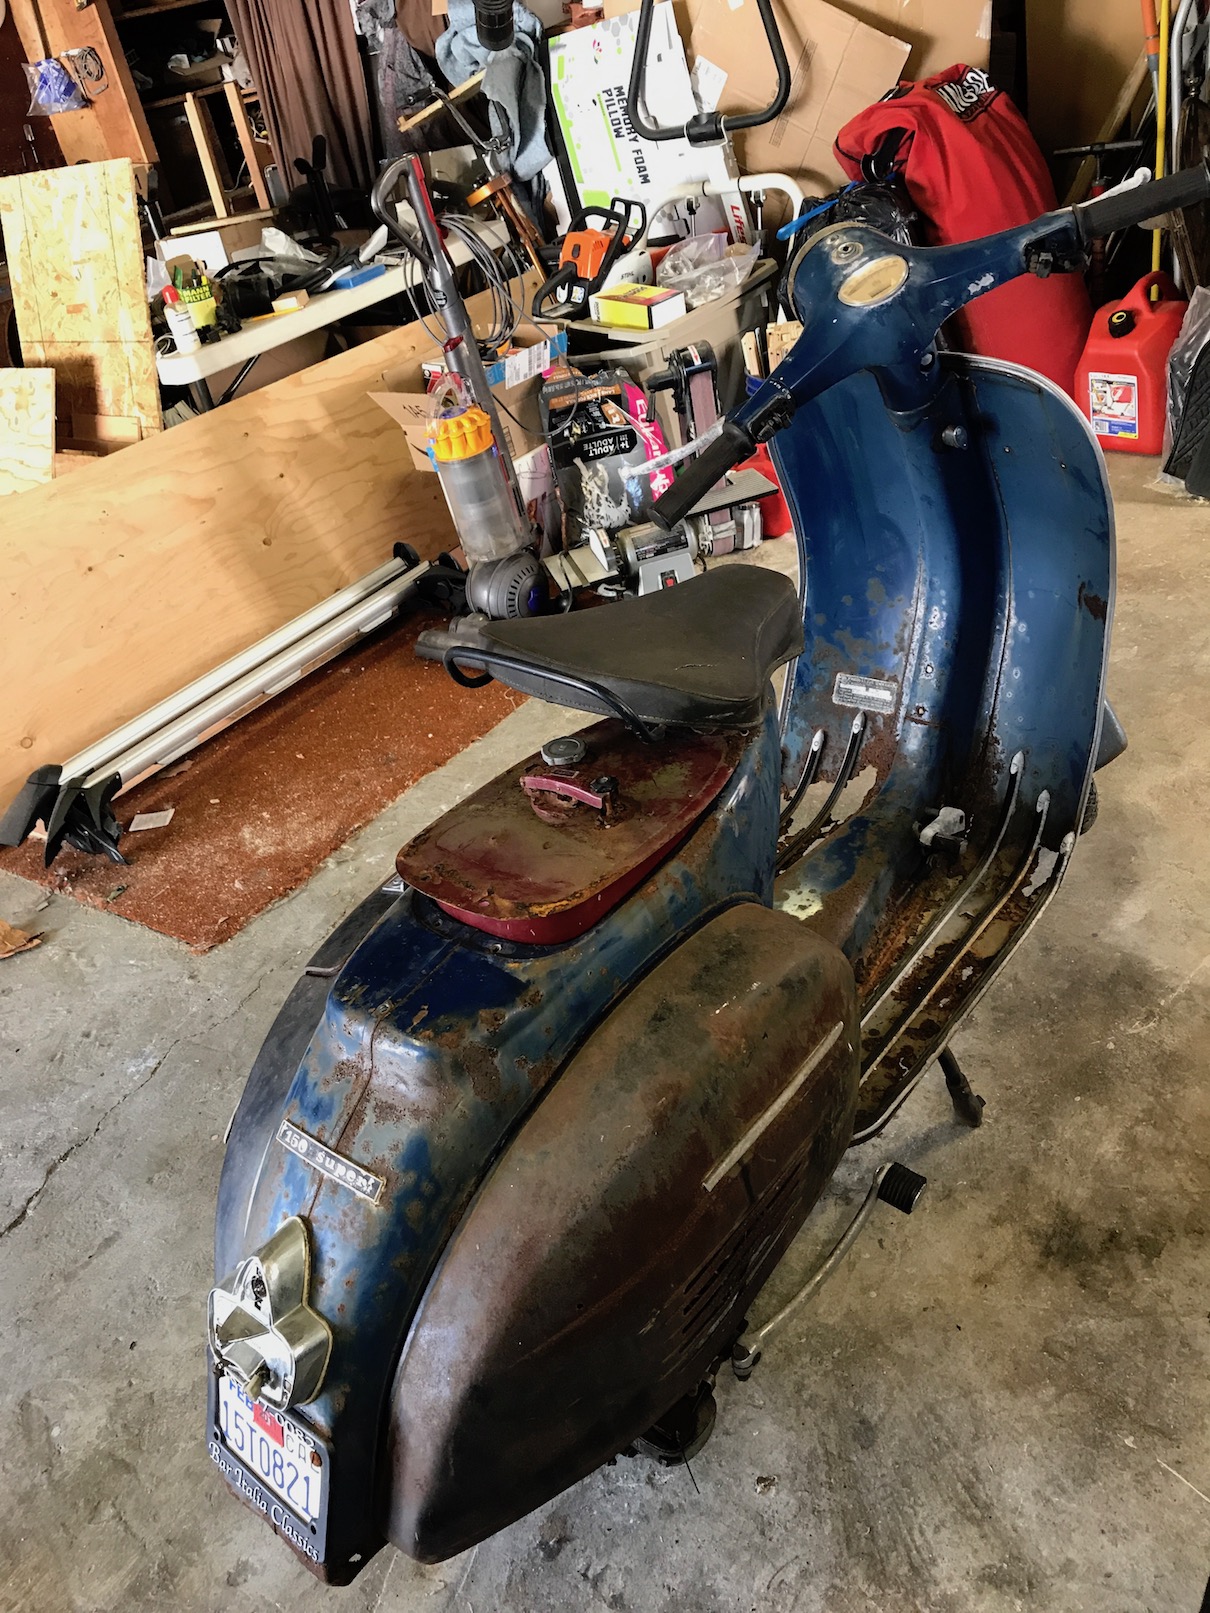
I found a 1976 Vespa VBC Super 150, American model (turn signals) on craigslist for $200, it was rusted mess with large gaping holes in the floorboards, but something said I should bring this thing back to life.
Ended up with
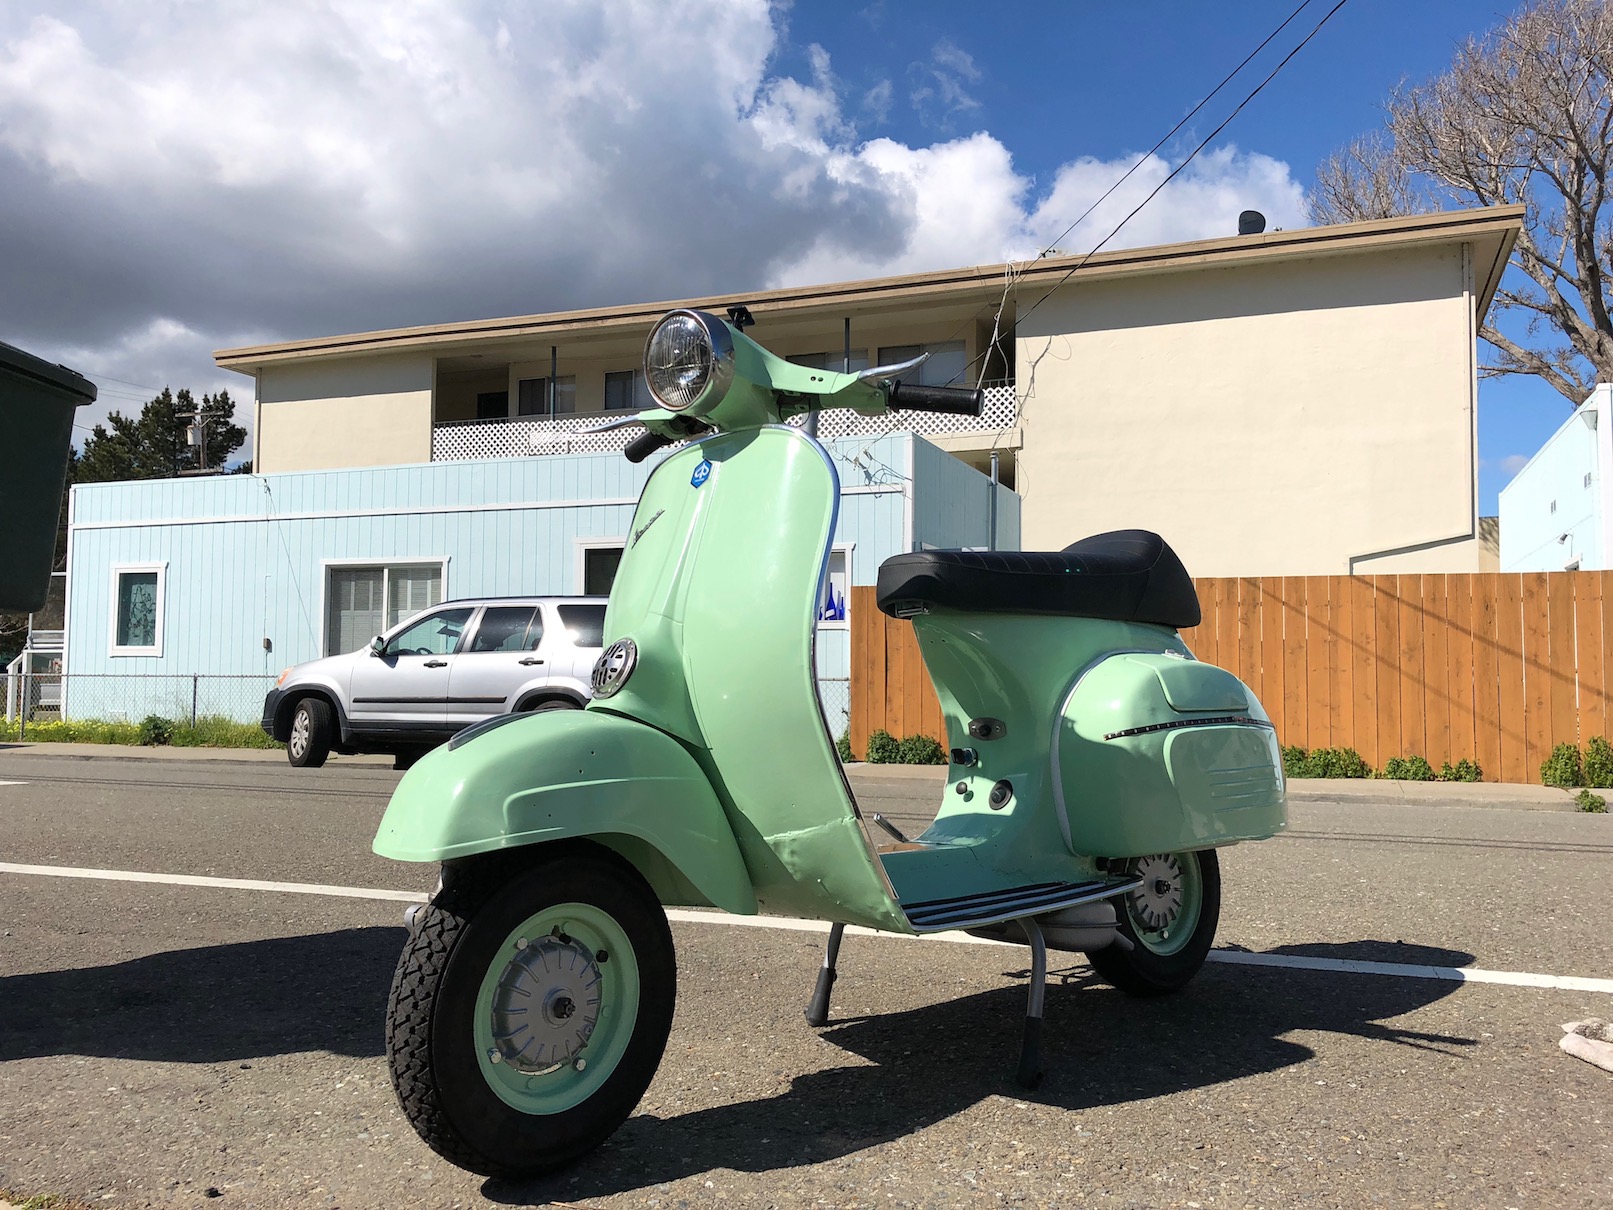
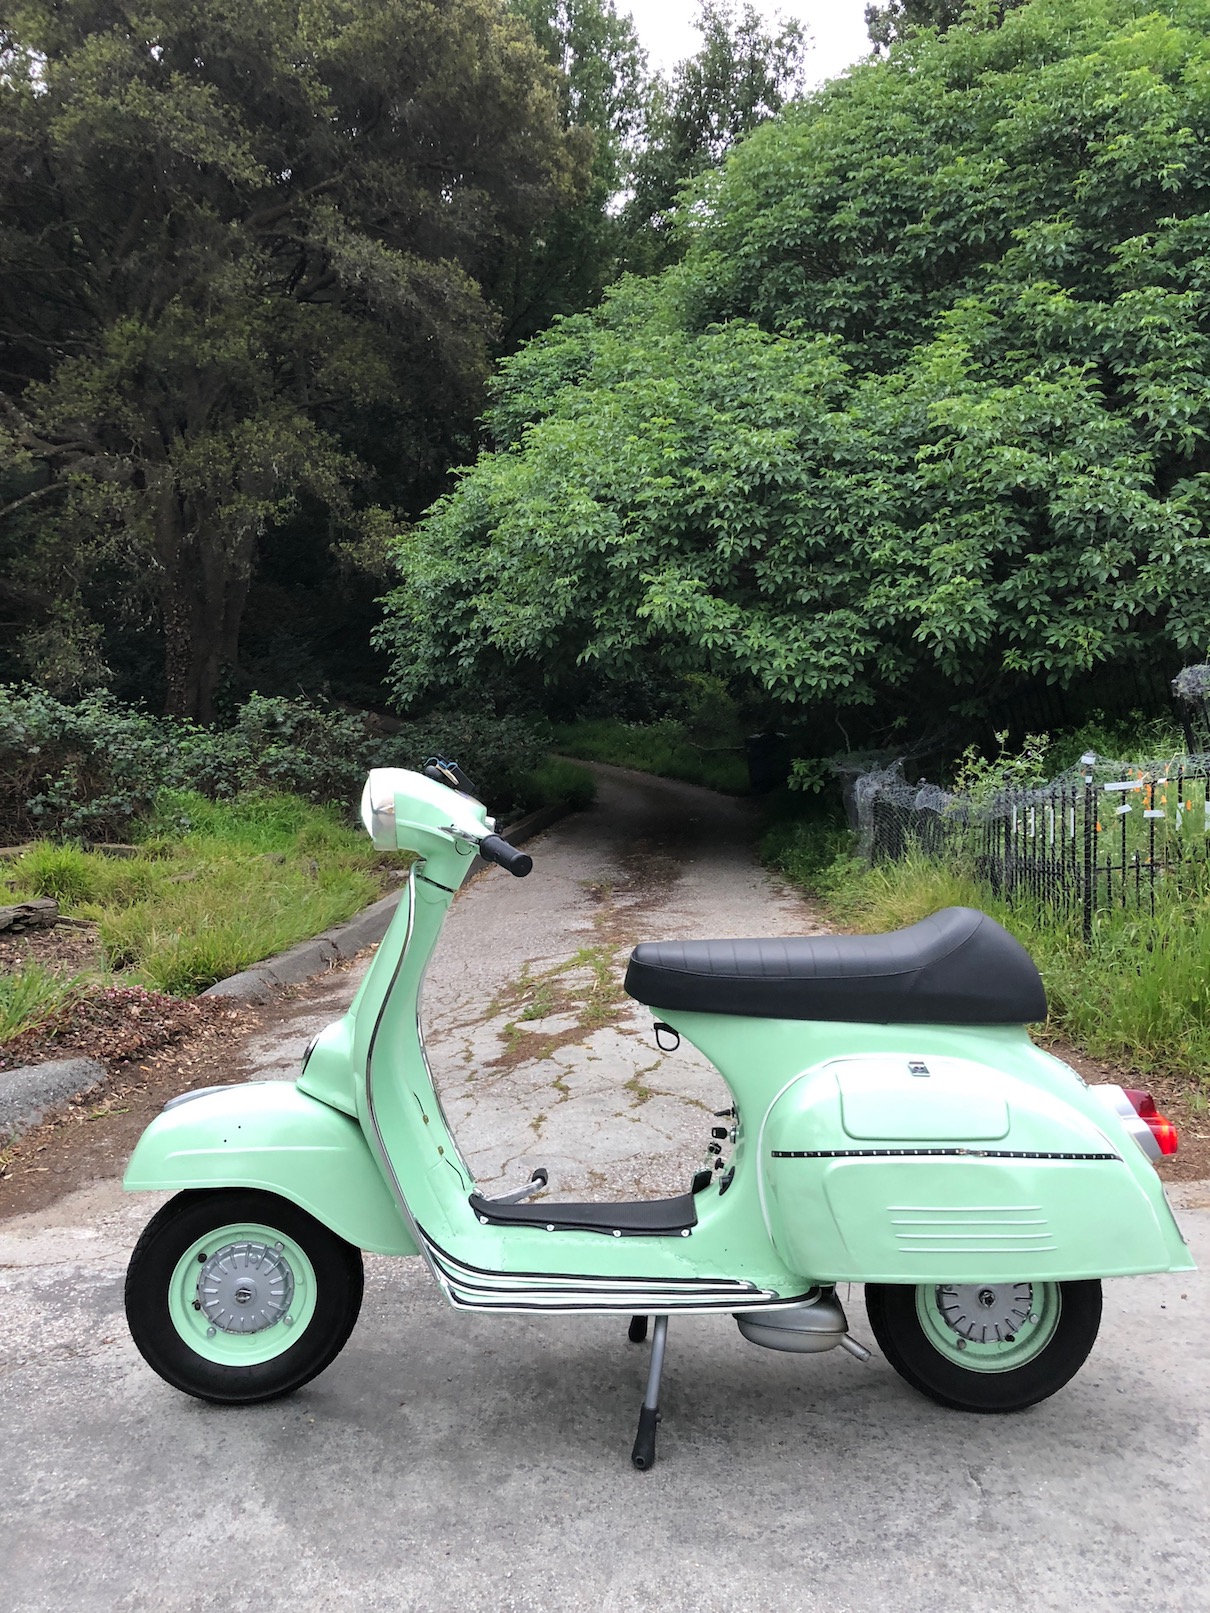
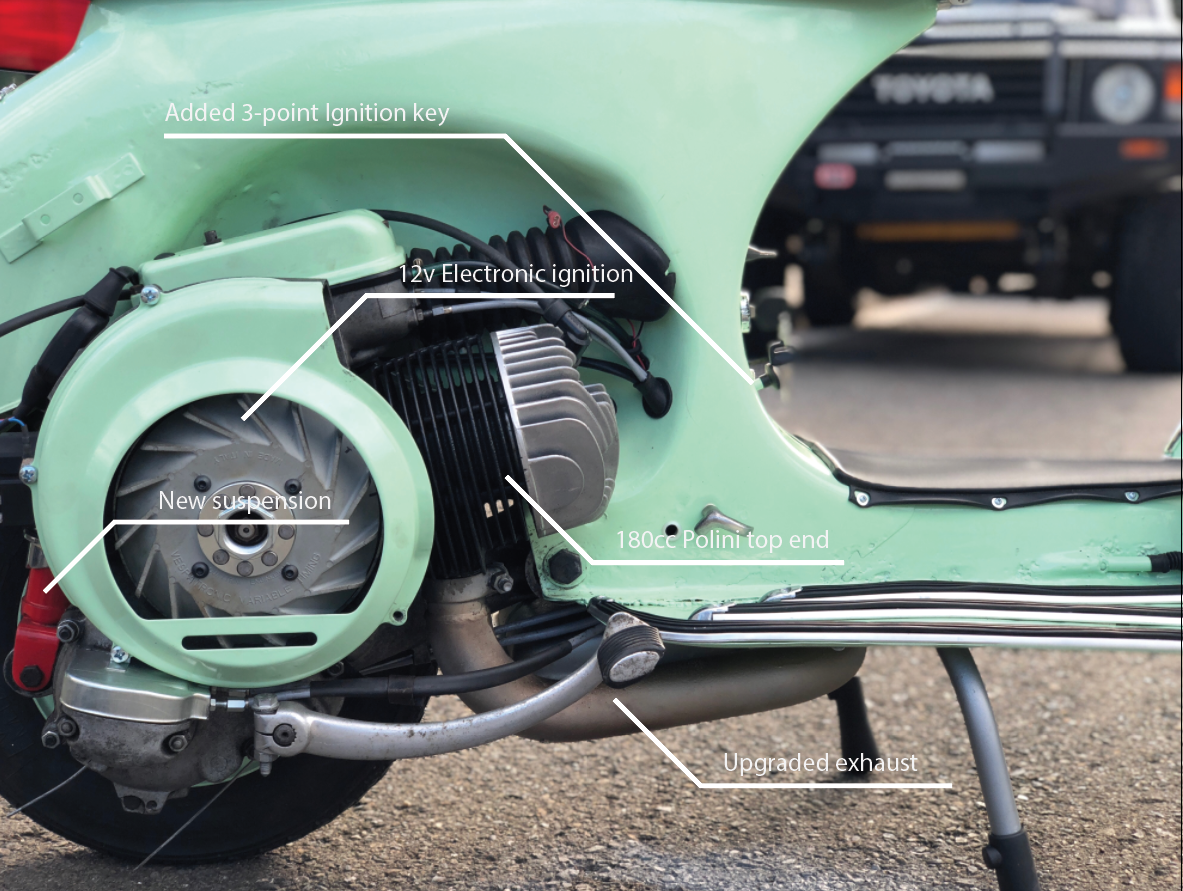
A nice little piece of history that you can park anywhere in SF! The goal was not a perfect rebuild, but a super functional Vespa daily. I ditched the old 6v electronics and points for eletronic ignition and 12v modern electronics that charge my iPhone, and run HID and LED lights and keep up with the added displacement of the 180cc engine. Also does not look too bad.
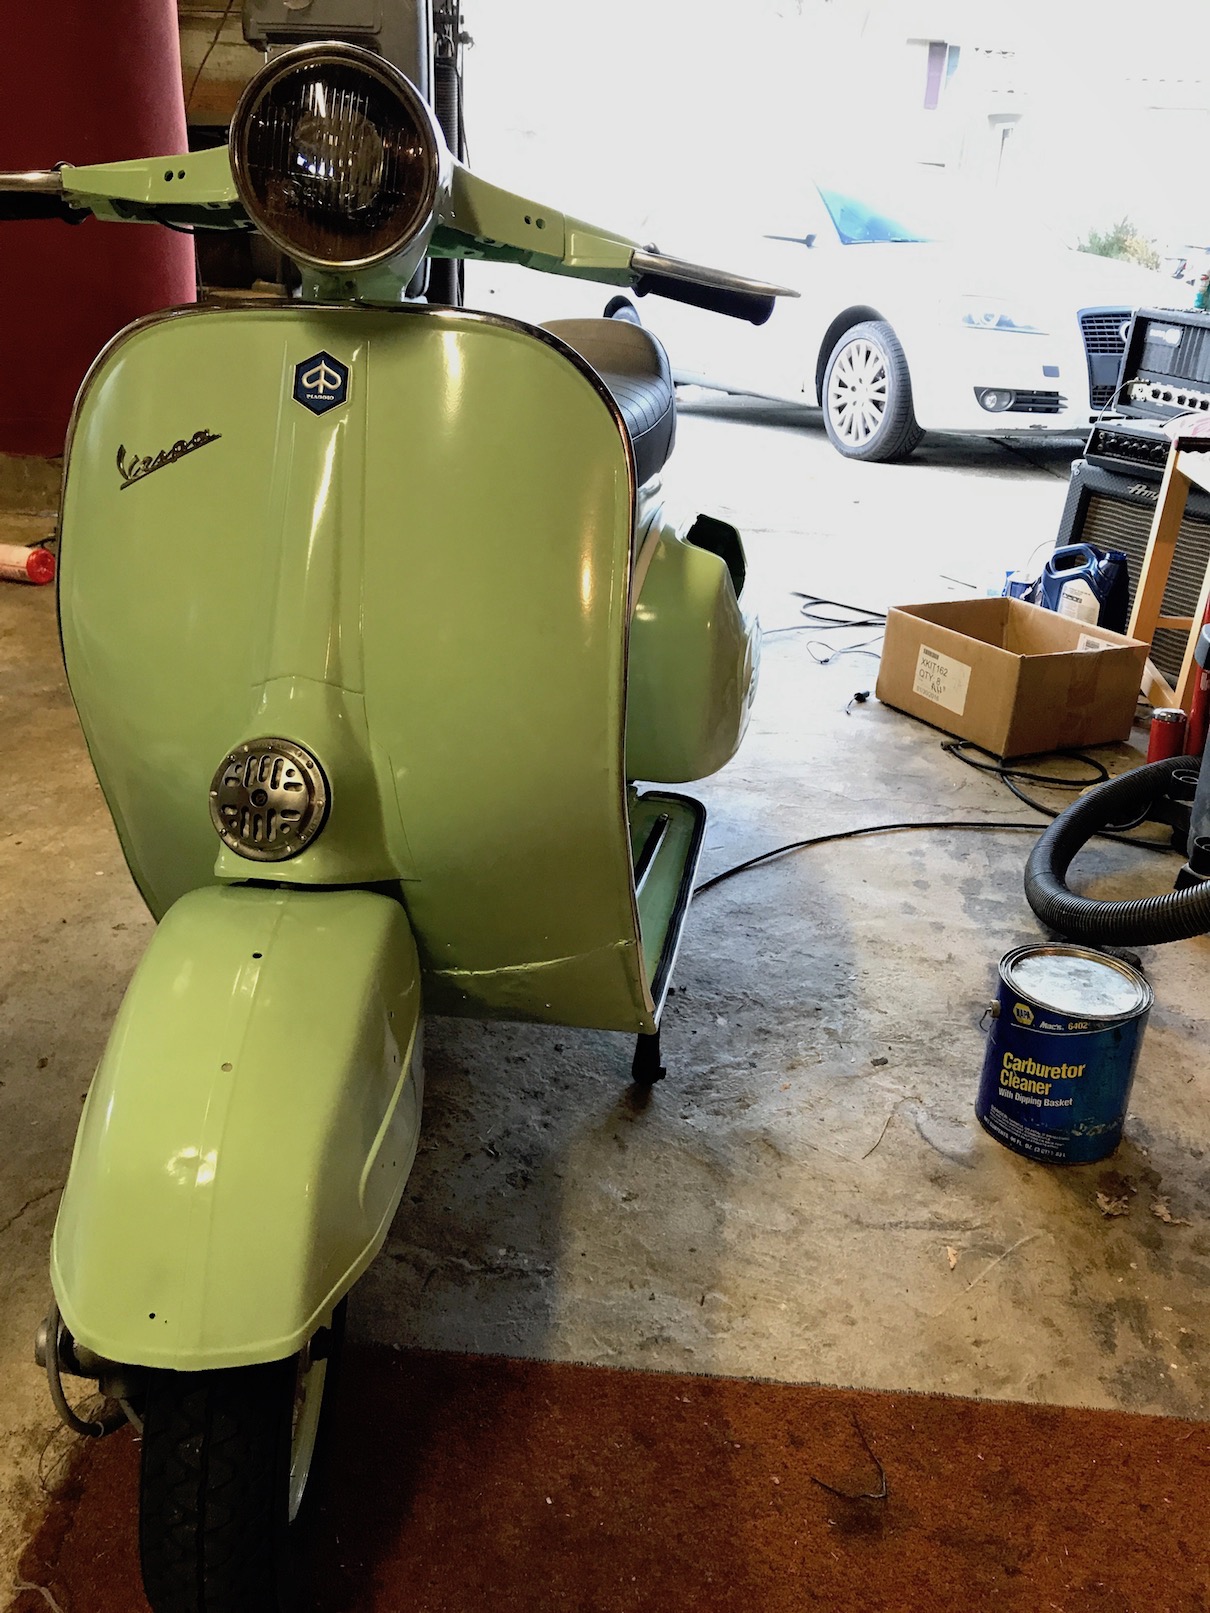
Before
I actually like the patina of the rust with the original blue, but the floor had large holes that would be a safty issue.

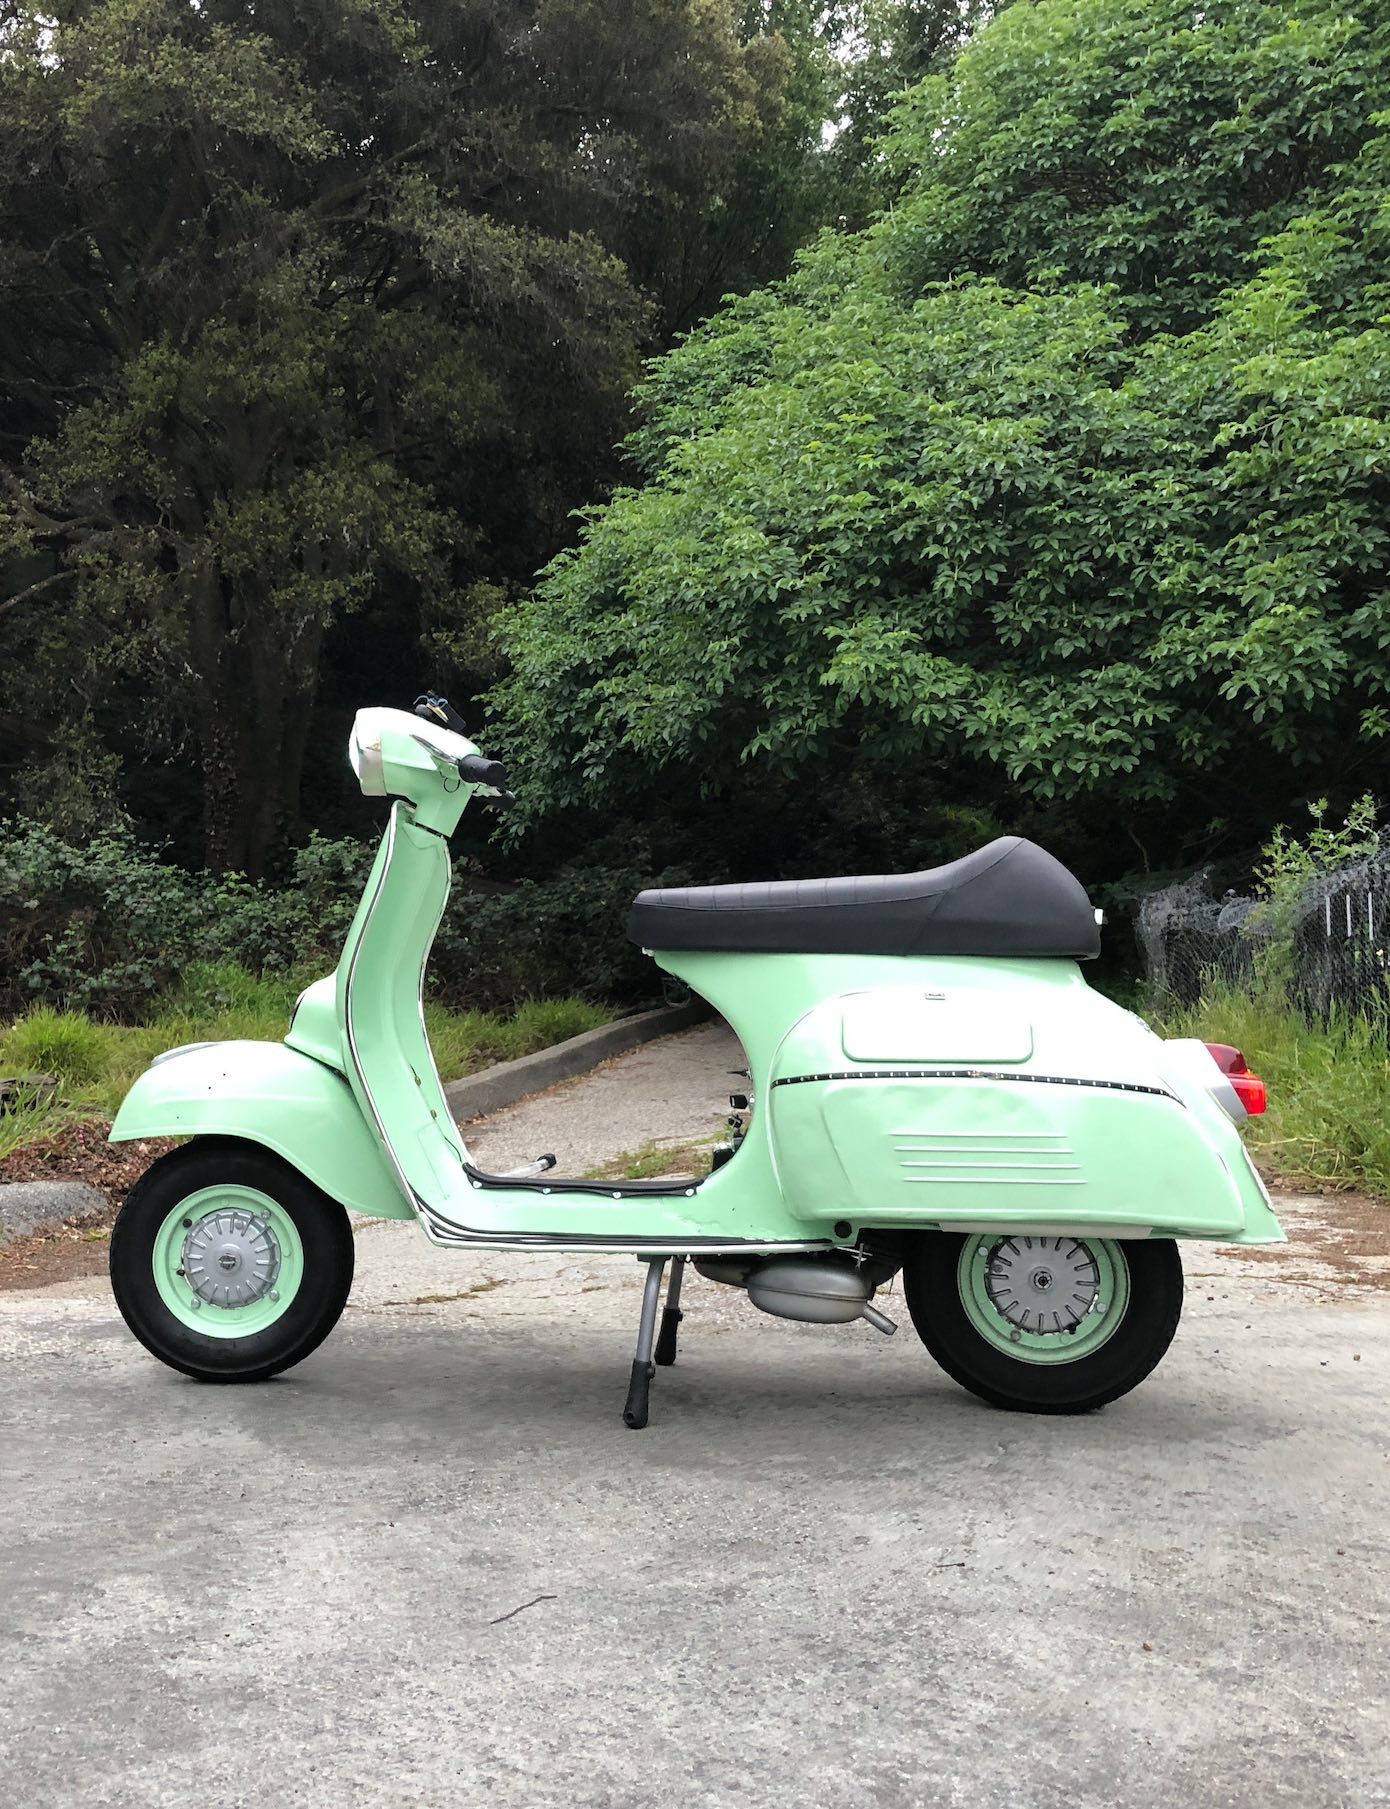
After
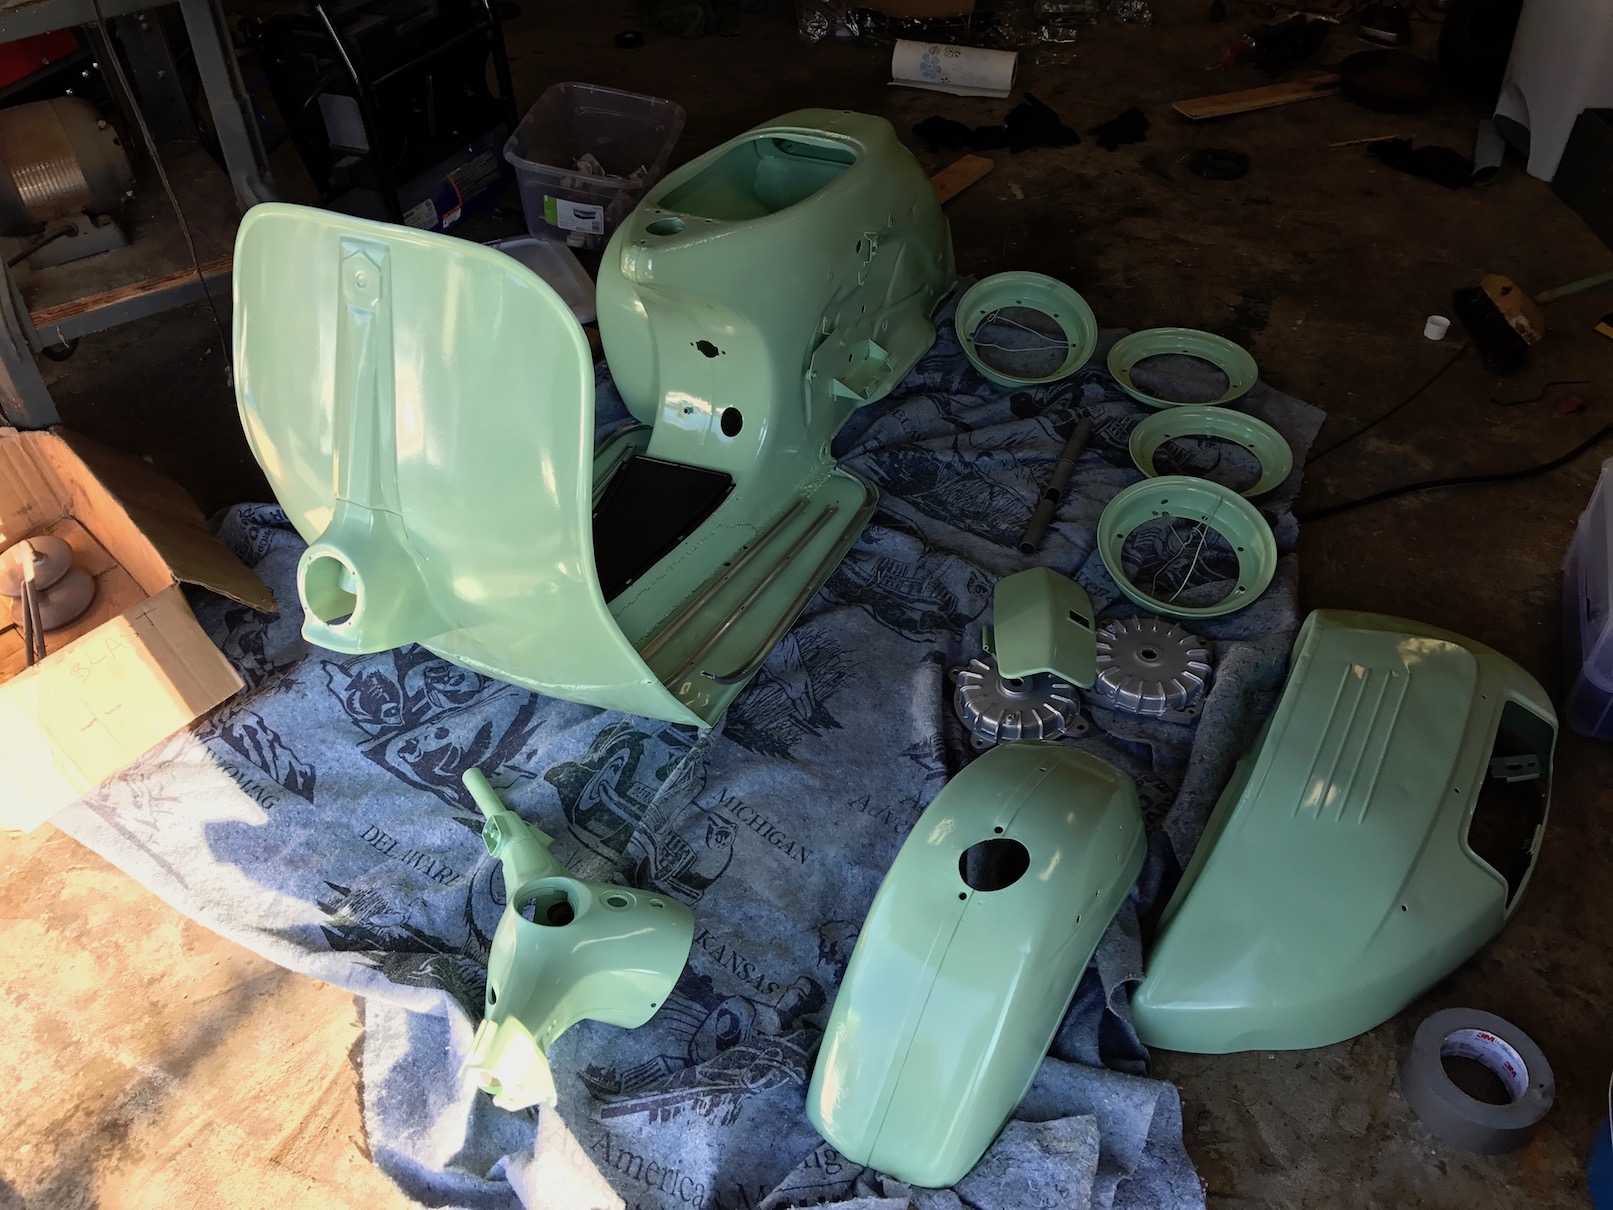
I went with a "Celeste Green" that brought out the Italian nature of the Vespa, this is a color popularized on the Bianci bike of the 60s
Process
The beginning
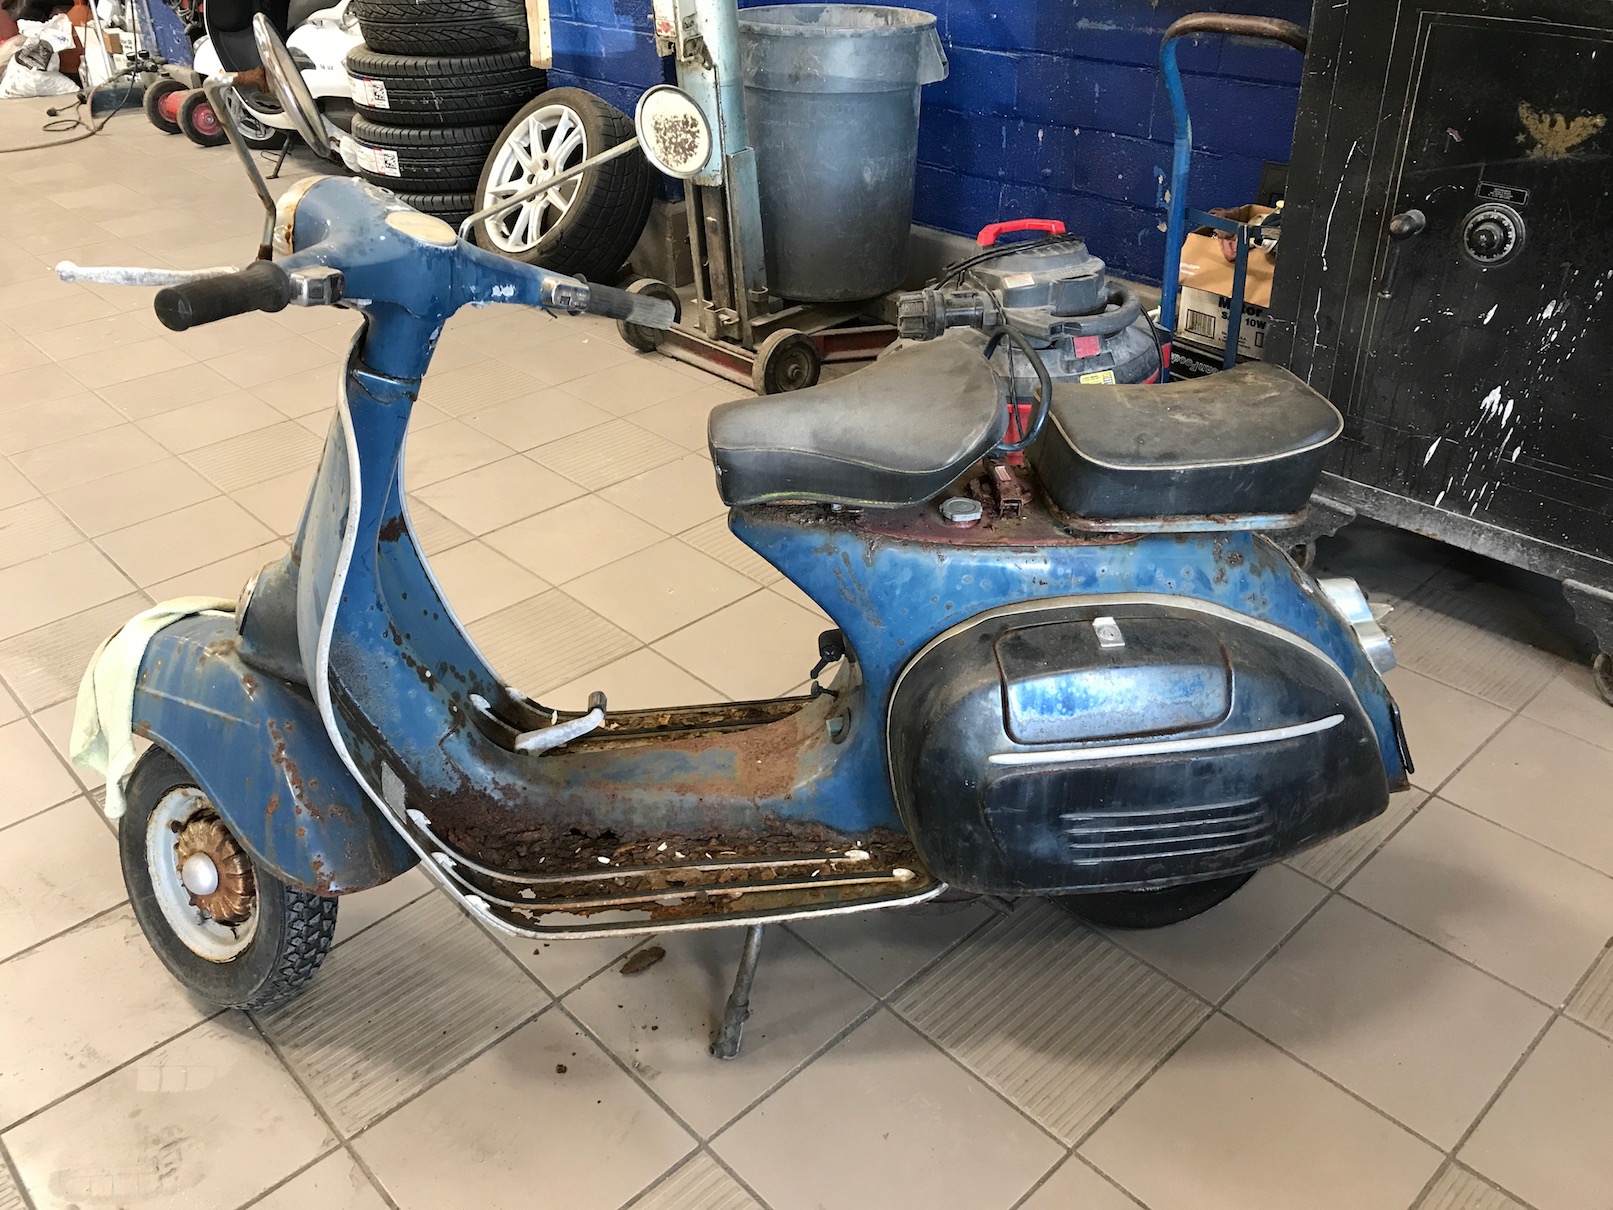
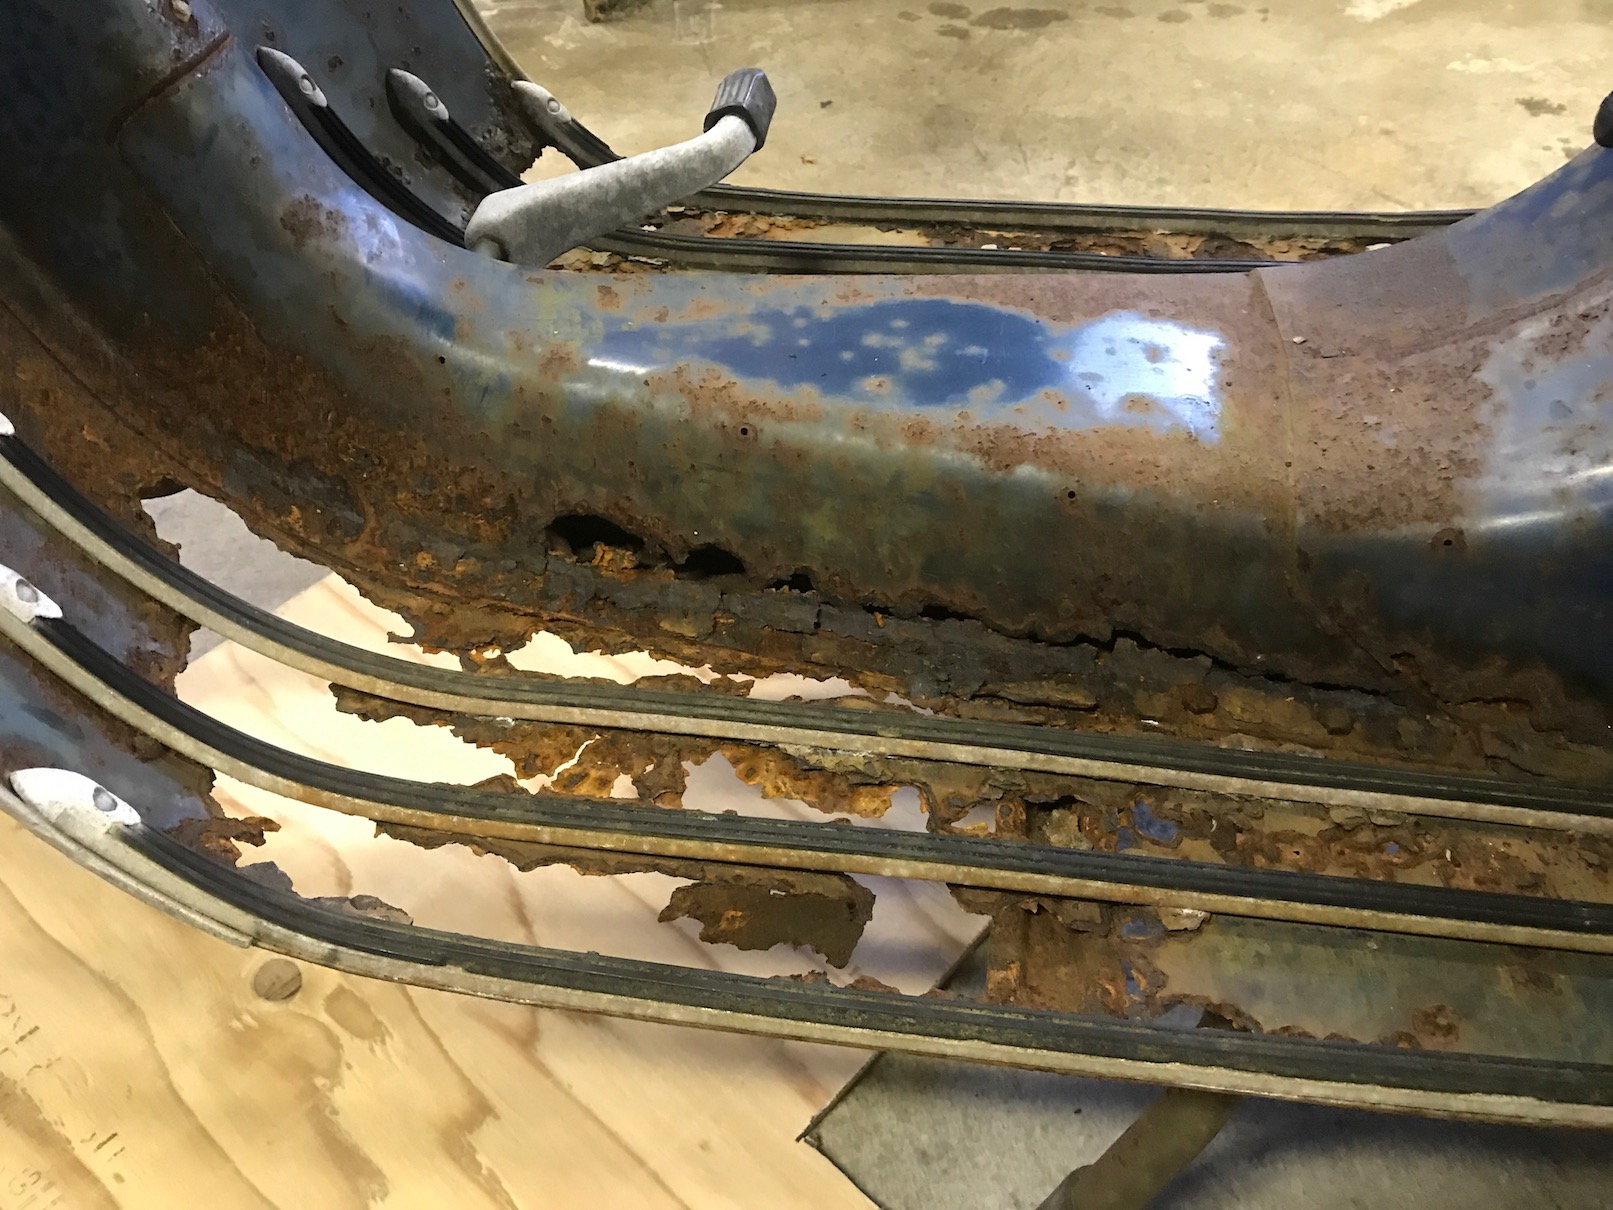
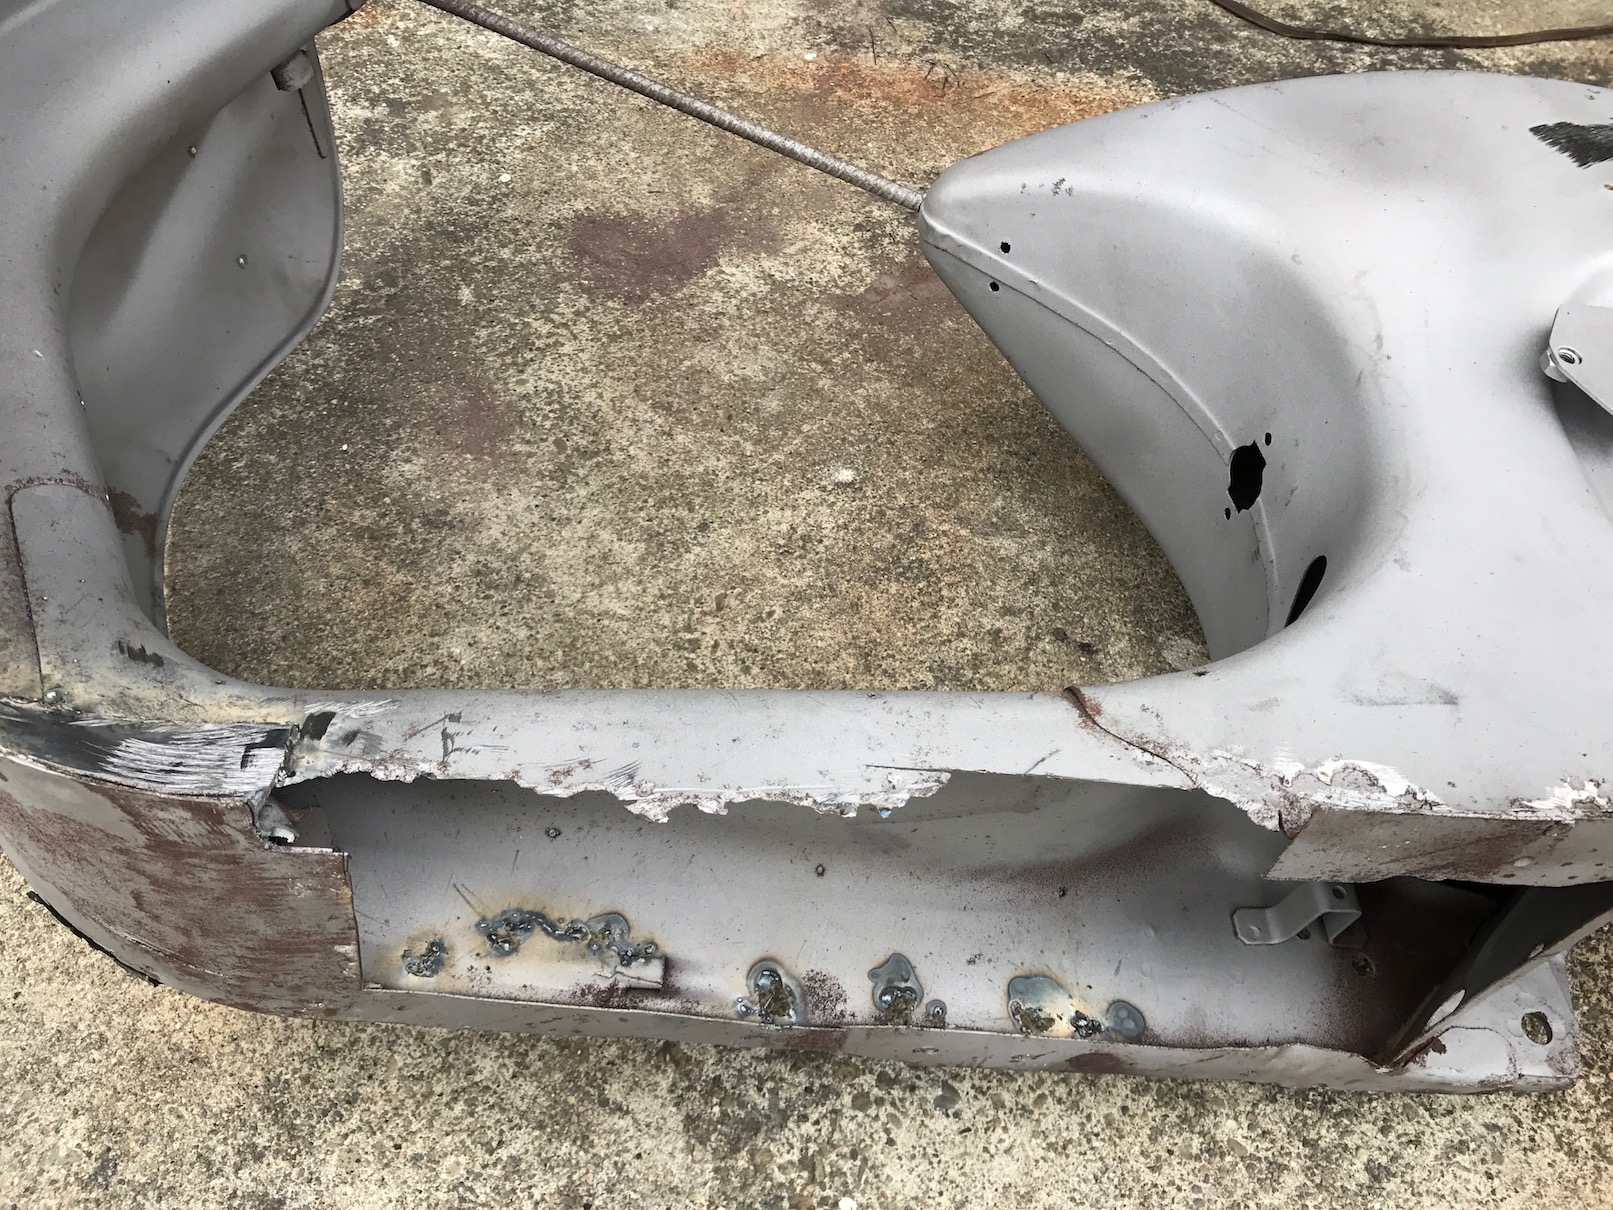
This old Vespa was in rough shape. Those are rusted holes right through the bottom. The frame gets strength/rigidity from this area.. so had to be fixed. Owner wanted it gone - so I thought it may be a fun little project to dive into for $200. Had a long road ahead.
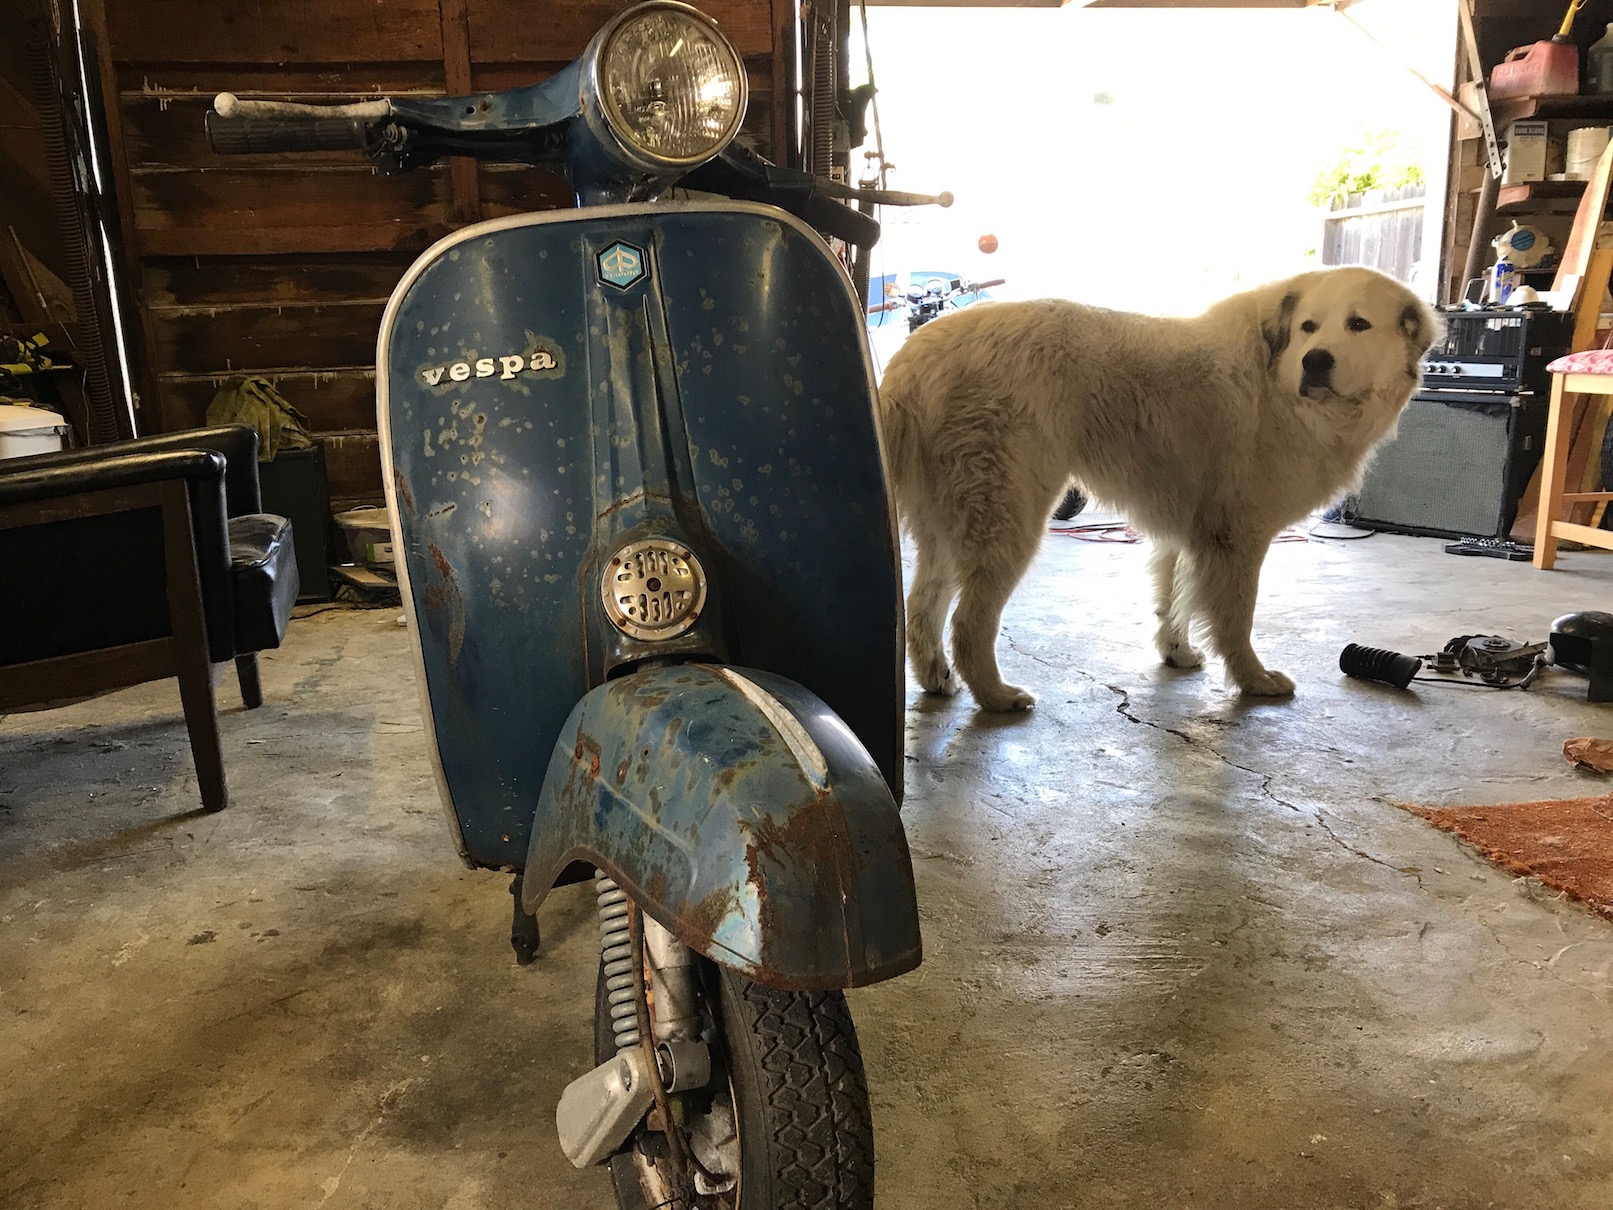
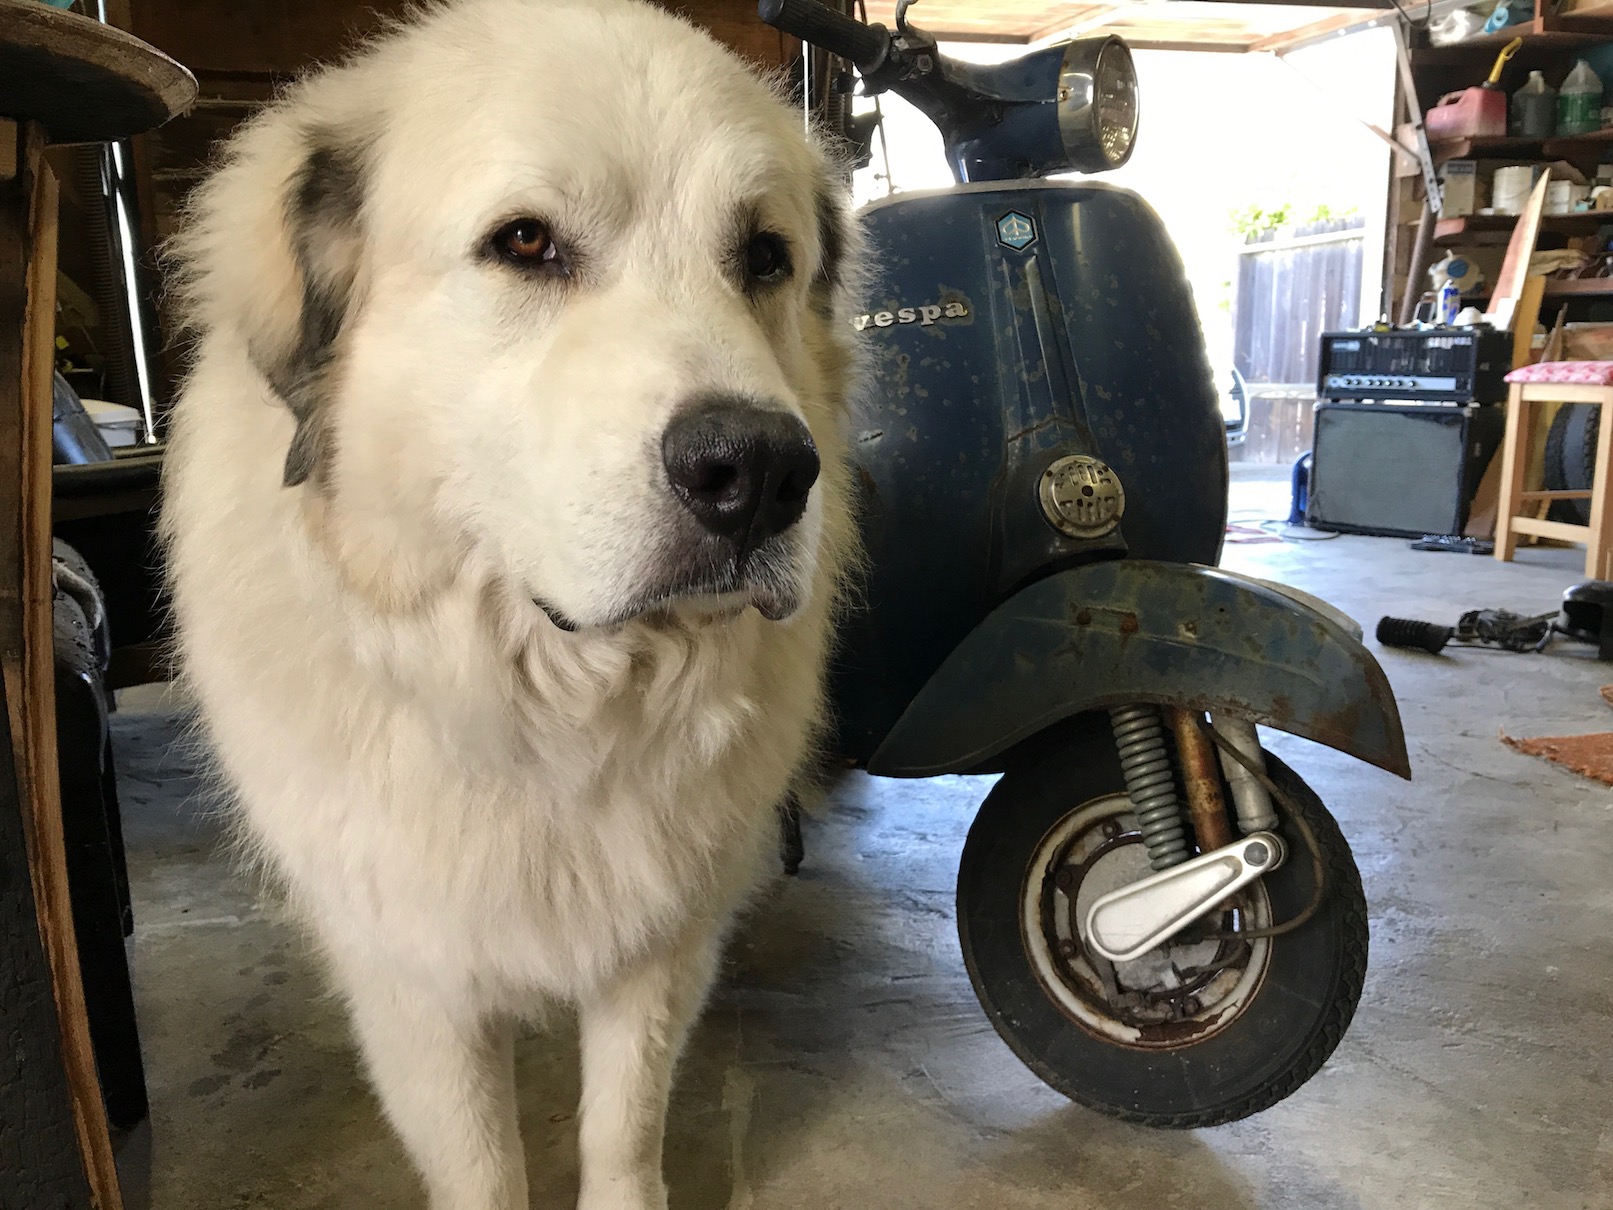
Calvin did not know what to think about the new project
When I brought the Vespa back home Calvin gave it a sniff, he was very skeptical I could bring this one back to life. Original ignition system was grounding out and windings were borked, I want to at least kick it over before the rebuild. But just had to dive in and replace it all. I began stripping everything on the Vespa.
Repair begins
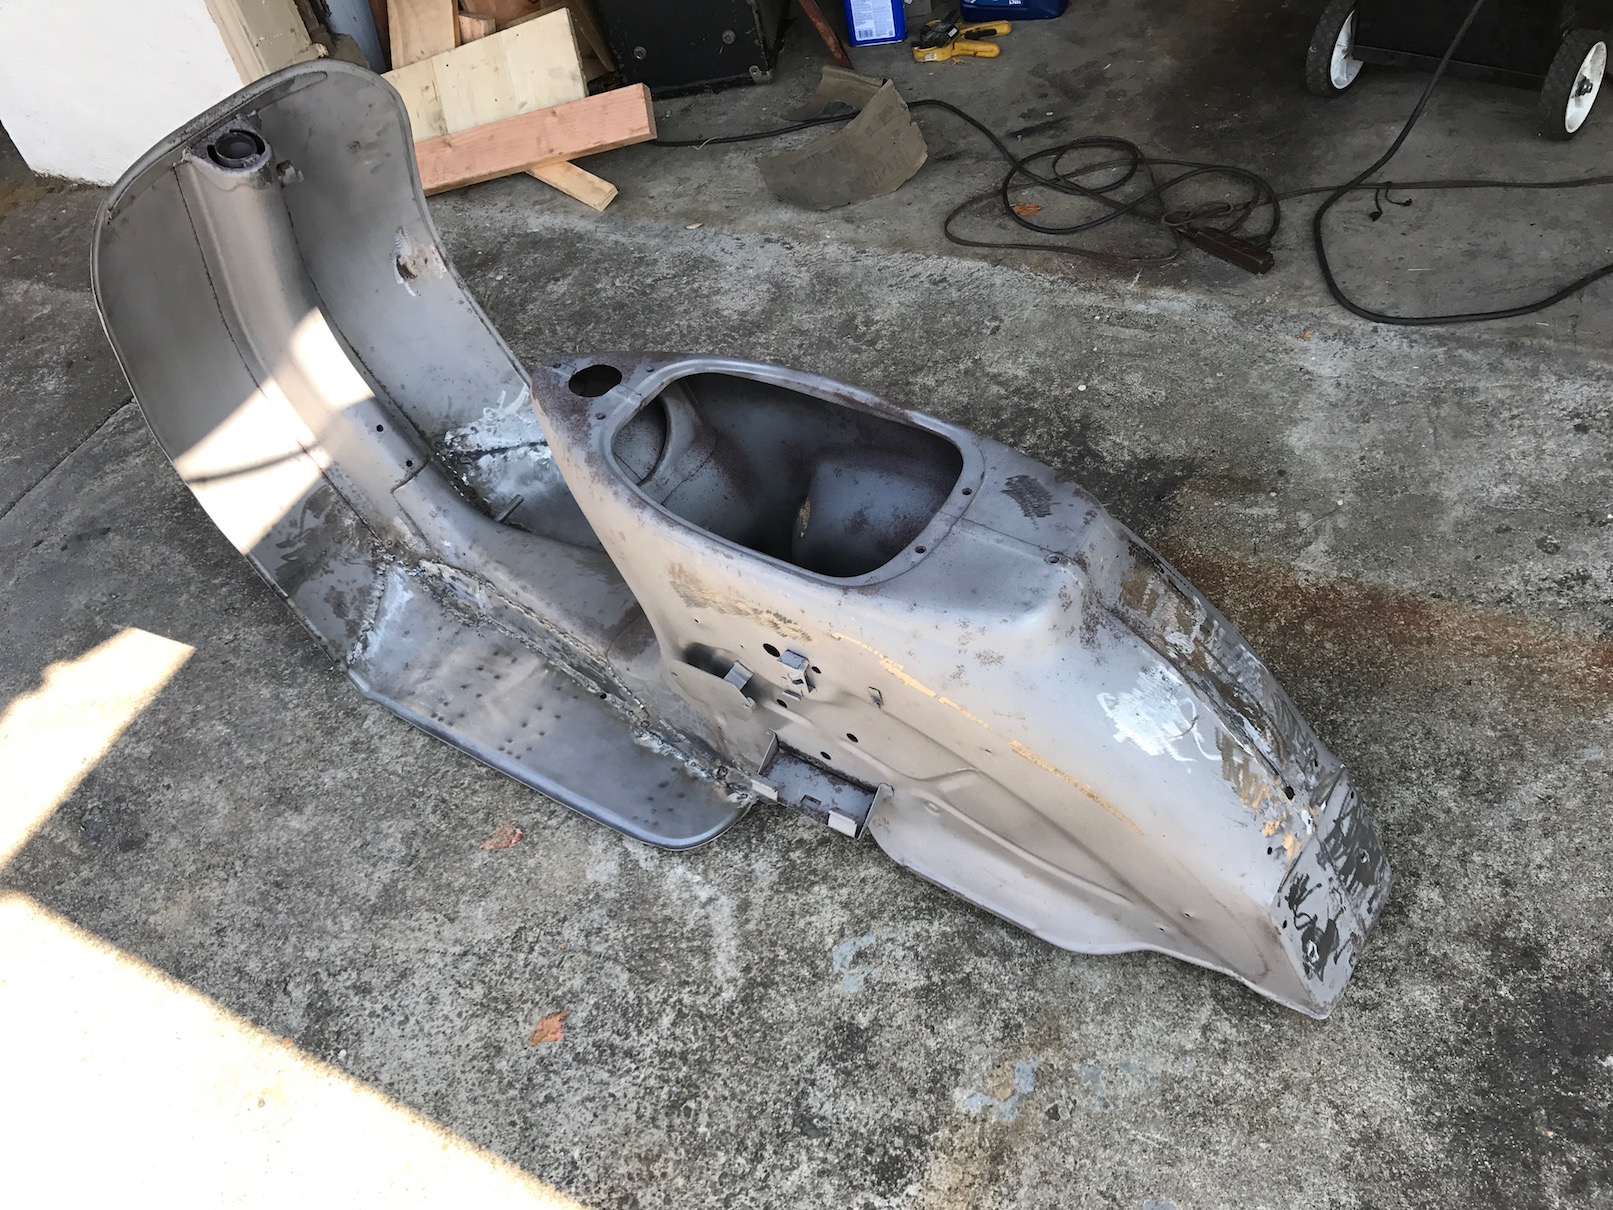
Dunked in a electrolysis bath
After I pulled everything apart I made a make-shift tub for an electrolysis bath. I performed this method on my 1974 Honda CB's and it is a great chemical-free way to remove rust through physics. I just had to scale it up for use on the large Vespa frame.
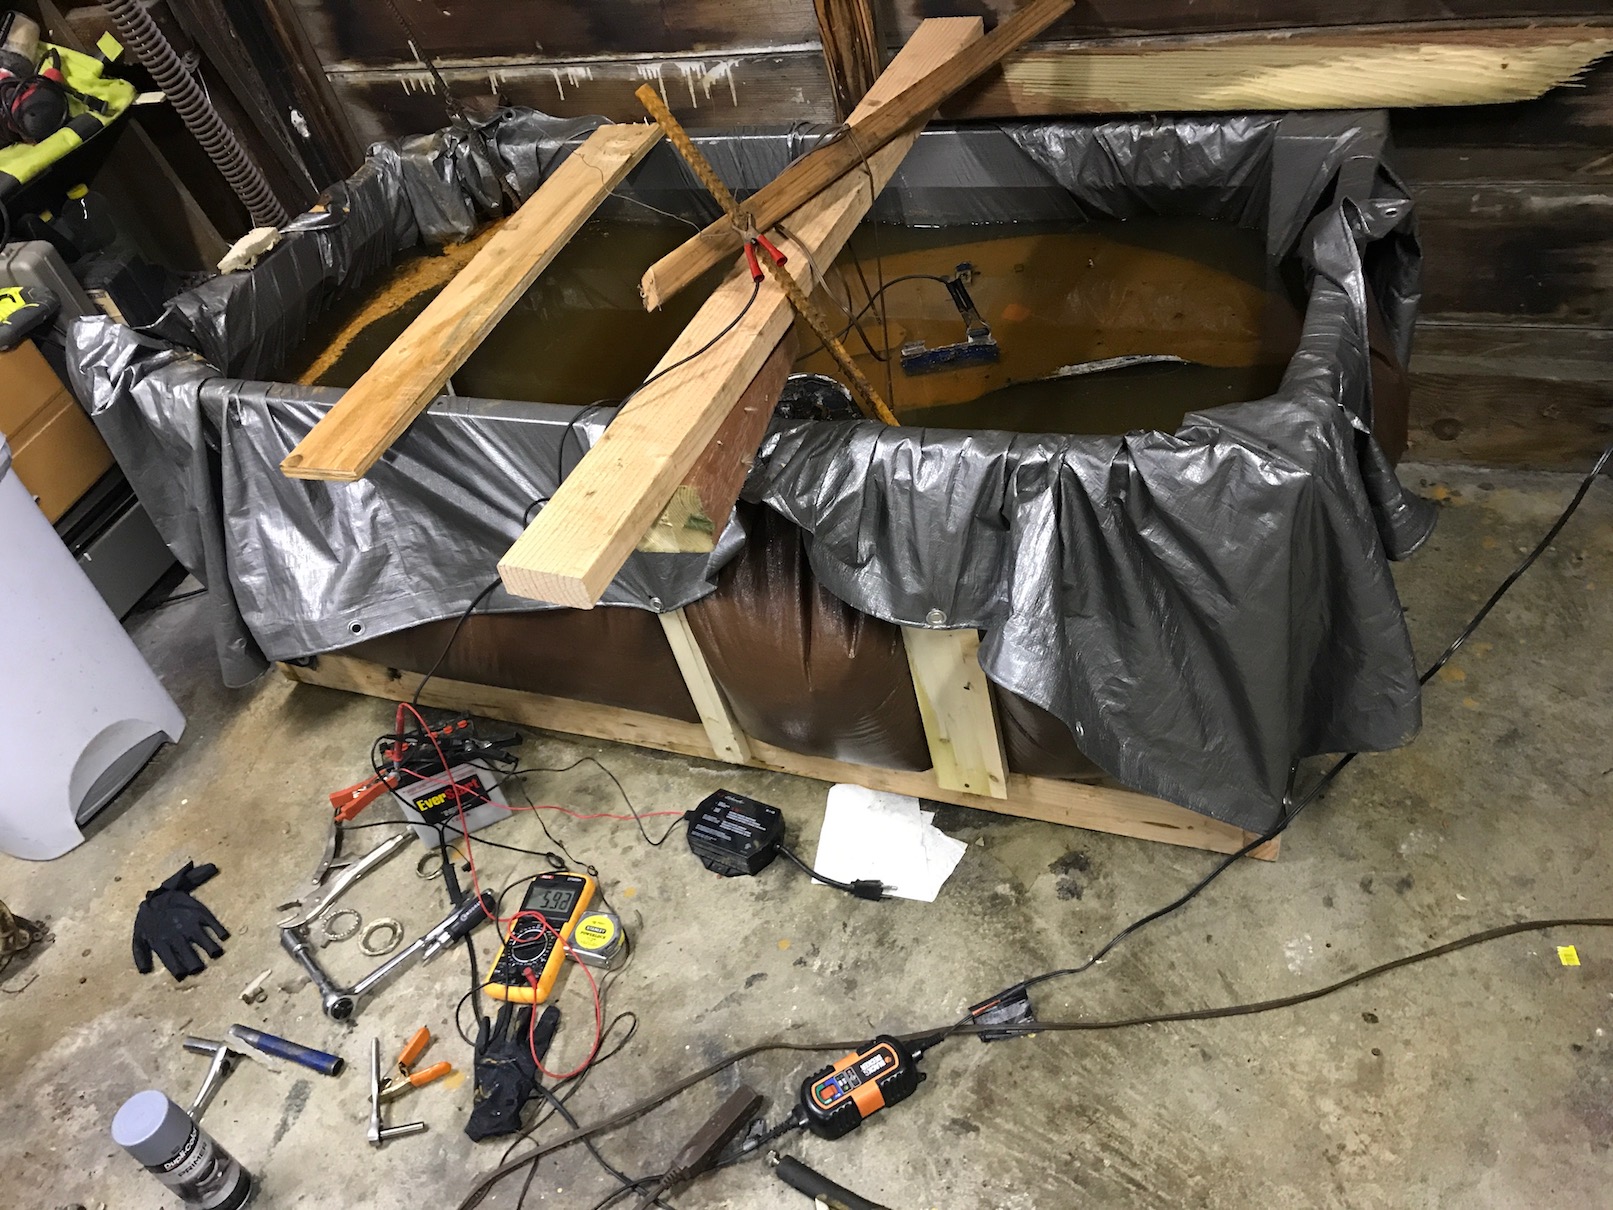
Rust removal was very successful!
Removing the rust via electrolysis was fantastic, but 20 years of rust still left it mark on the frame. I had to cut out the cancer-eaten parts and weld in new metal. My neighbor gave me a wire-feed welder and showed me the basics. It is a pretty quick learning curve and feels amazing to be able to manipulate metal. I added the rebar to keep everything in place while the main structural piece was out. It made a huge difference and would not have been road worthy if I did not do that. The new metal is stonger than the original and can take on a sidecar easily (thinking about Calvin).
Opted for powercoating
Paint is fine, but powder-coating is strong and can take day-to-day dings much better. A local SF shop did this very inexpensively for me, and the end result looked great!
Engine
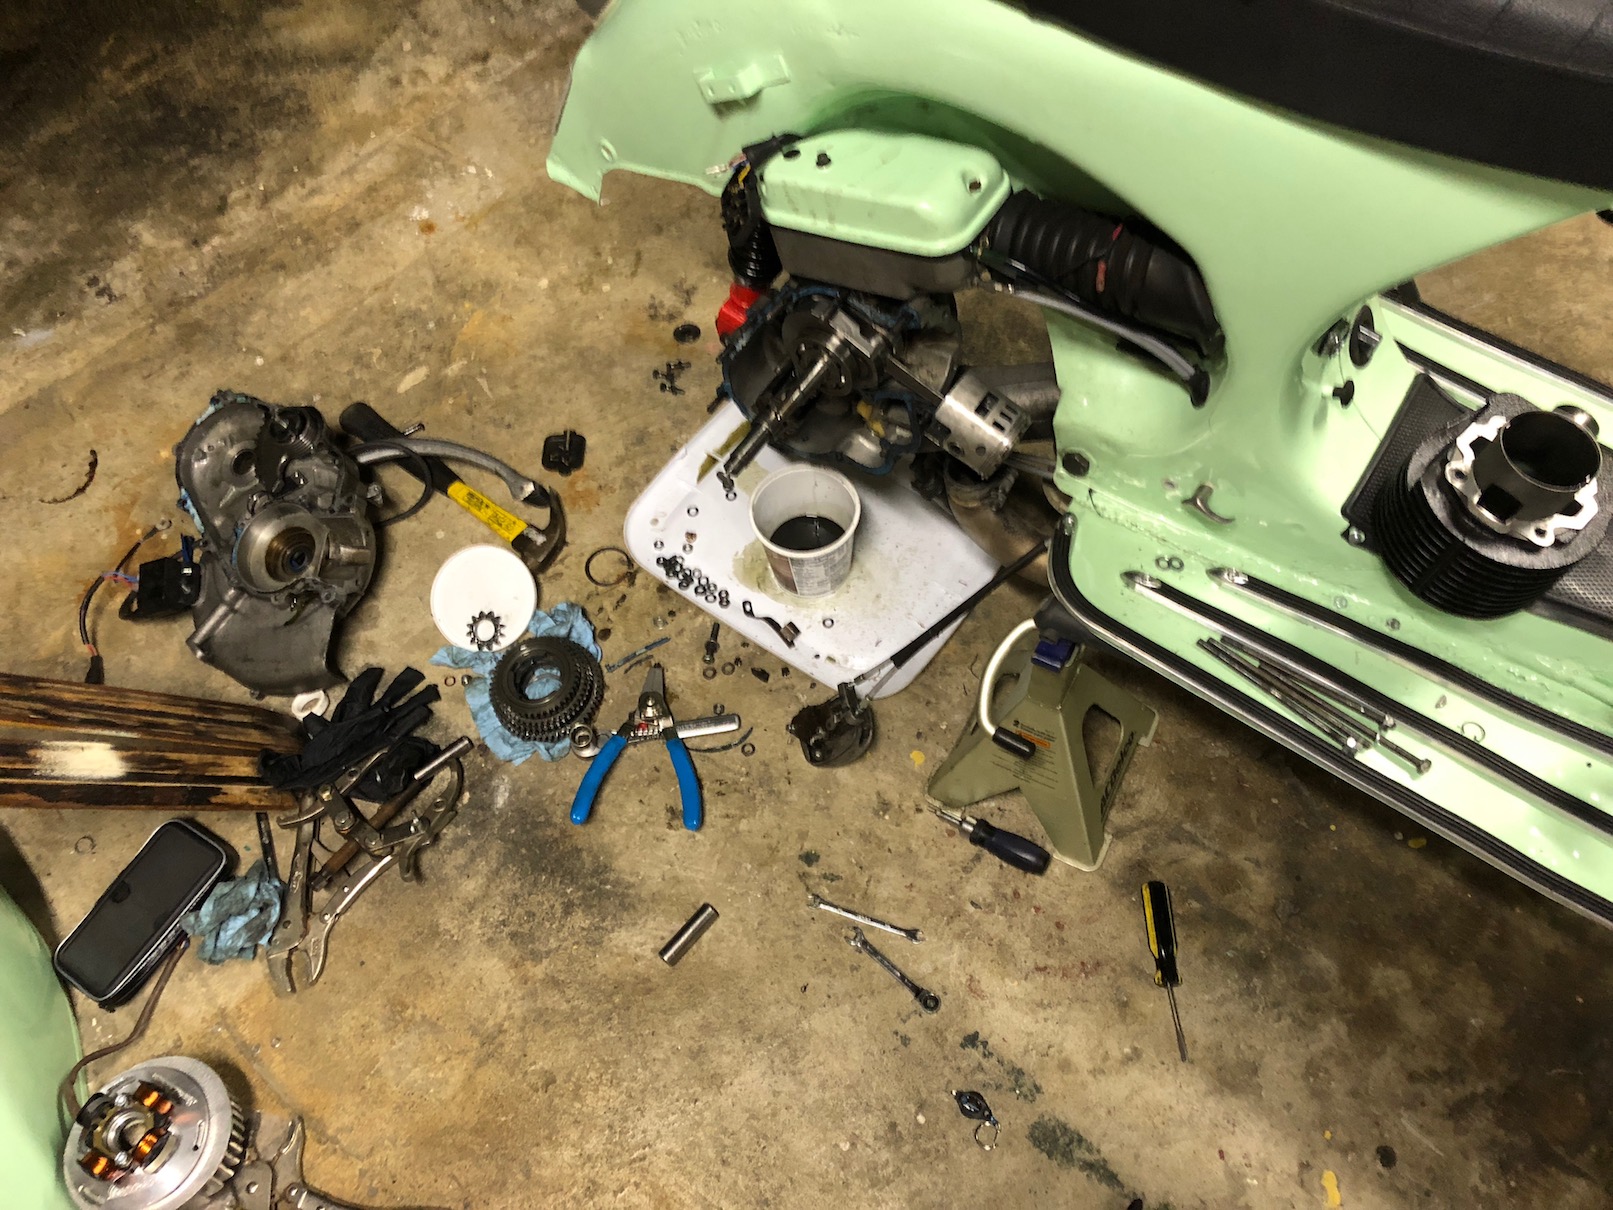
Cracking that engine open
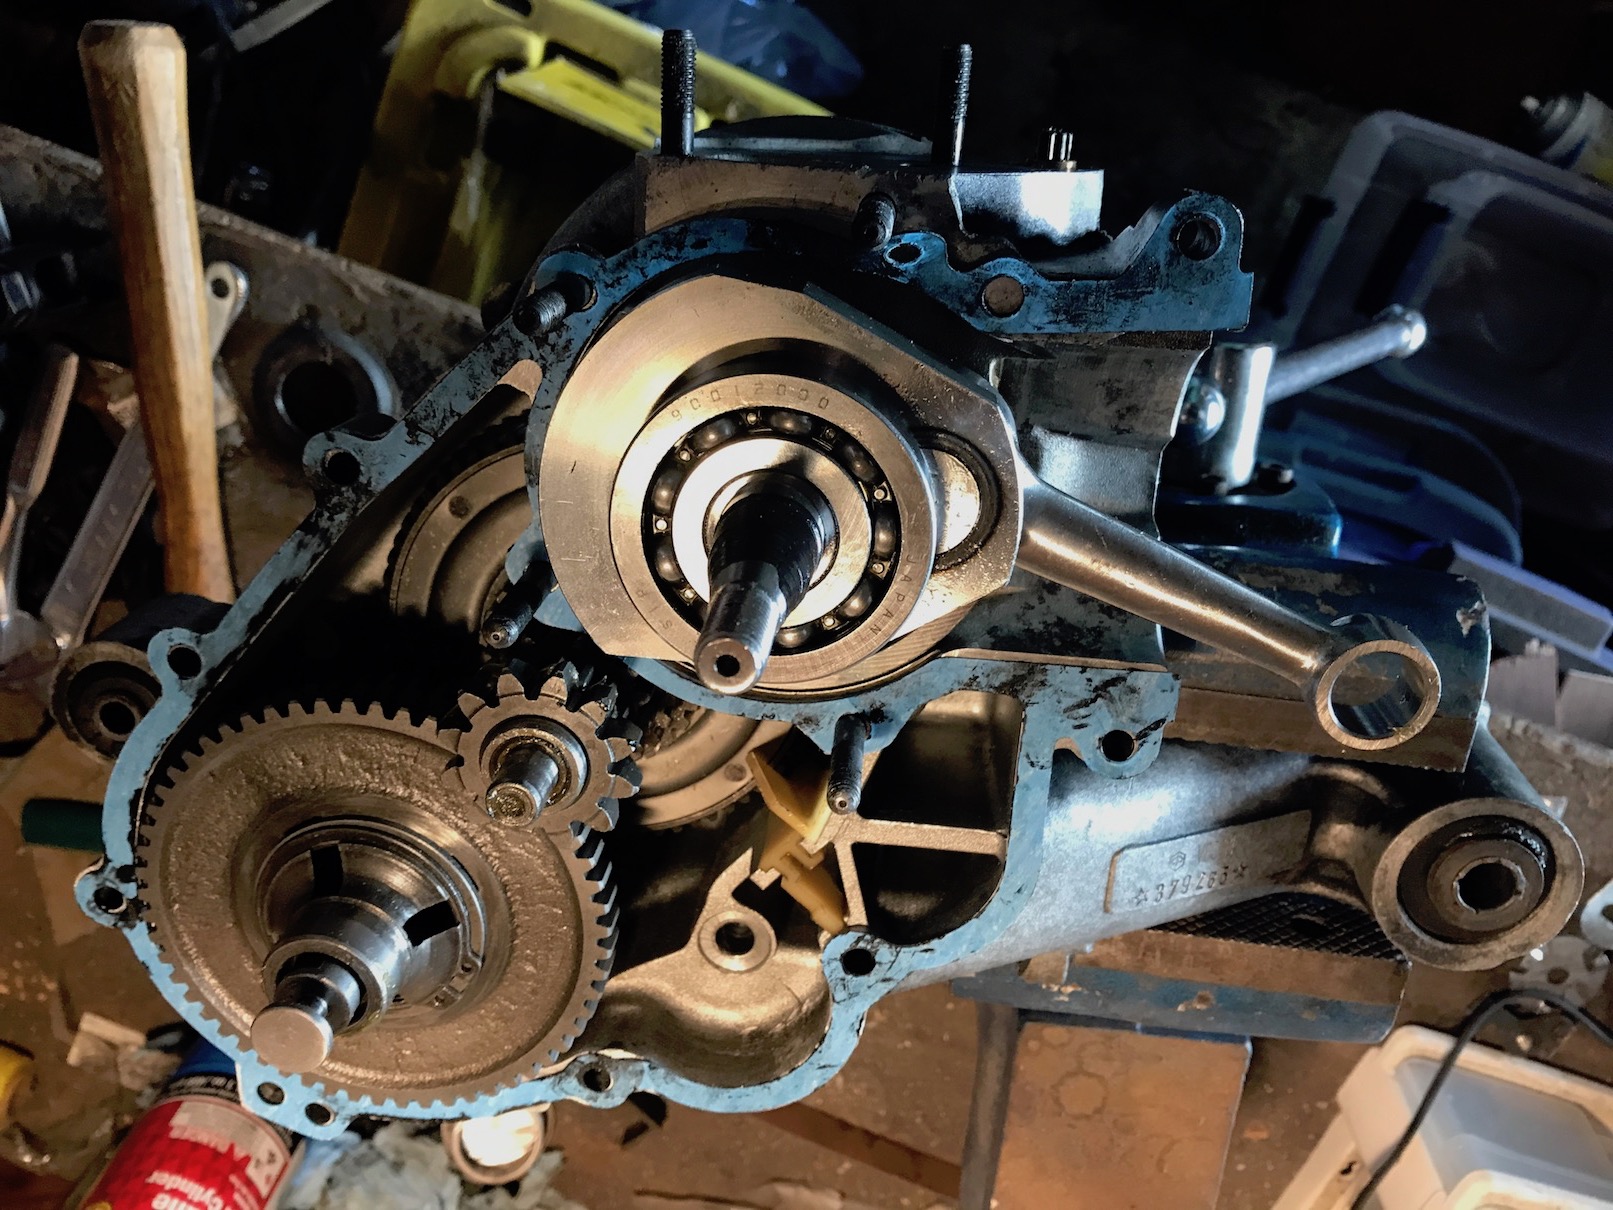
After pulling apart the engine I found it to be in pretty good condition. It was just the main seal that needed replacing. Rebuilt not too long ago, but since I had it open I thought I would do some upgrades to keep up with SF traffic.
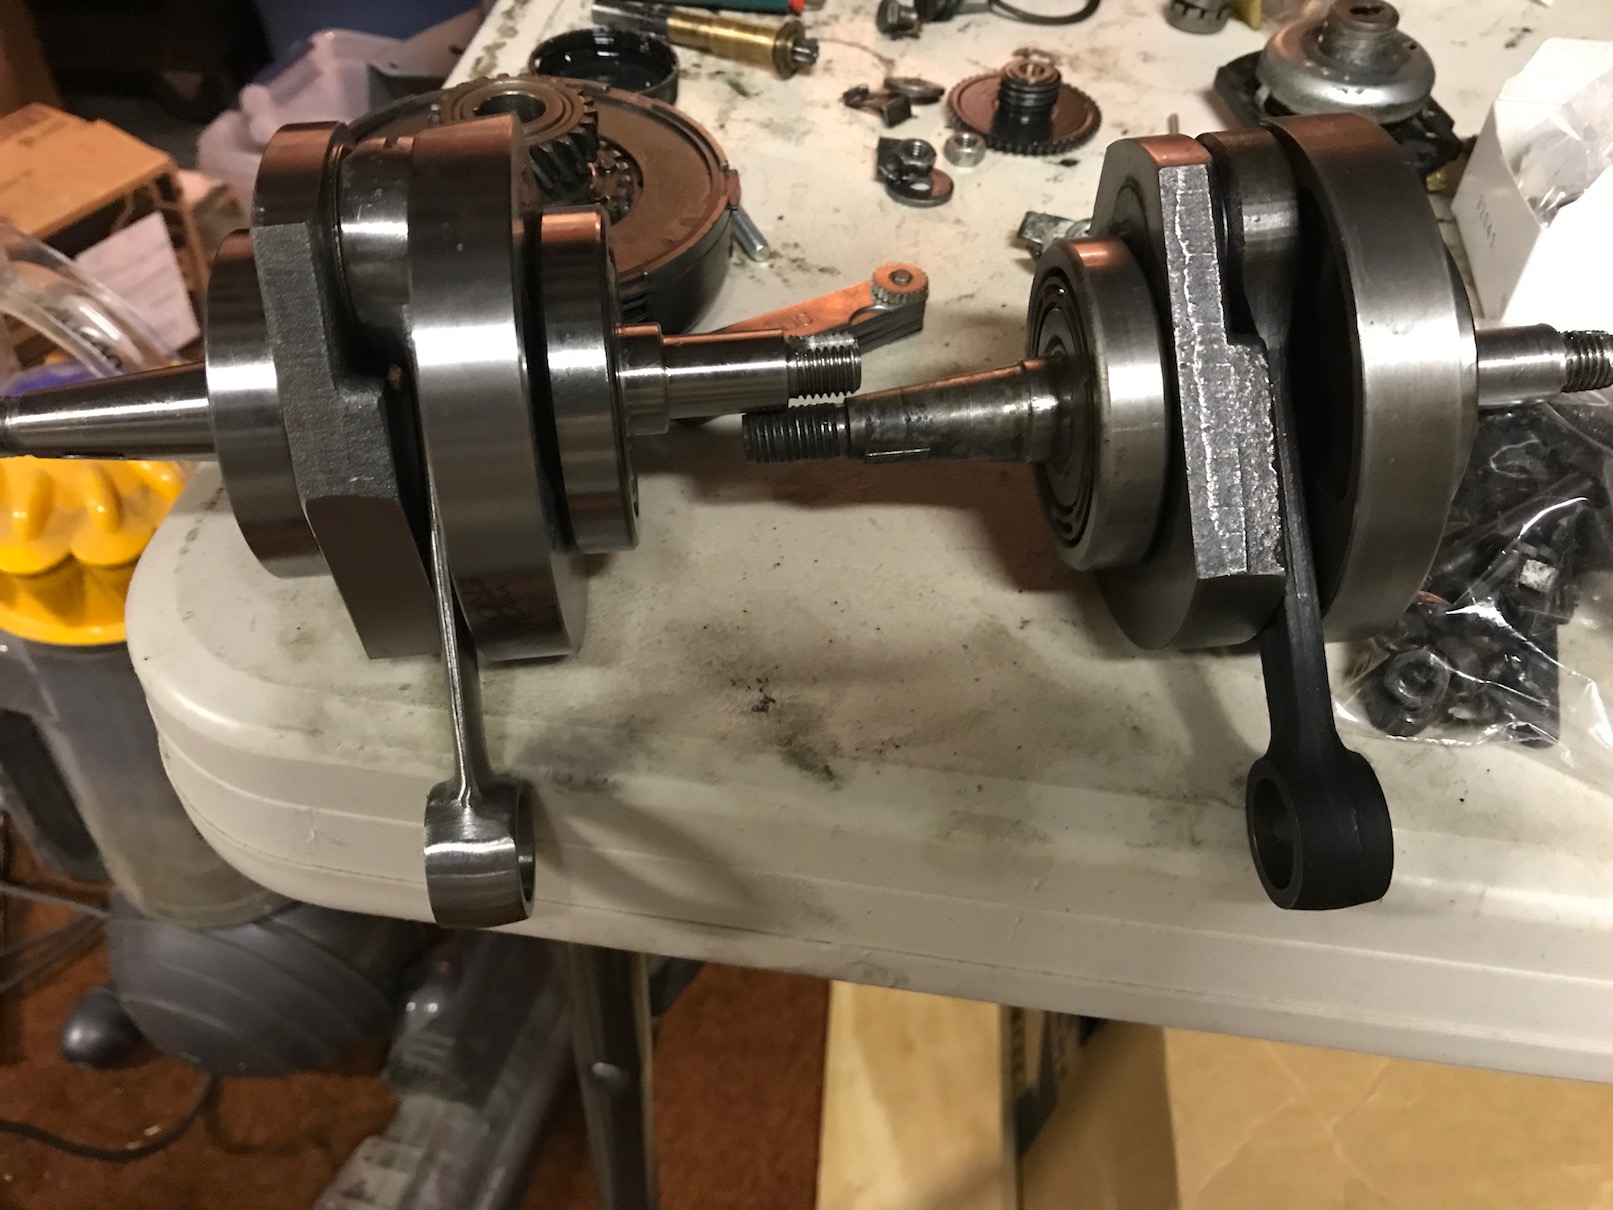
Engine upgrades:- Race-cut crank to pull in more fuel and air for each stroke
- 9-ball main bearings to rev higher
- Firmer flywheel springs and clutch
- Dremel to port and polish ports to match 180cc cylinder
- Polini 180cc top end
I even minted a new method of opening the engine case if it was really stuck, with a flywheel puller and without using a one-time use Vespa tool. Adding to the Vespa board knowledge.
Putting it all back together
Since you actually seal up the engine it put it back together slowly and meticulusly as I did not want to open it back up for another 40 years. You can see the difference on the right from the regular crank to a race-cut crank.
Modifications
some select modifications
After putting it back together the upgrades end up looking pretty good.
Not the end
In great running shape
The Vespa is road worthy and driving all around SF. As design is never finished I am sure I will be making changes.