The Vespa
Chapter 1 — Restoration
Restoration mechanic, Industrial design, Welder
Started with
I found a 1976 Vespa VBC Super 150, American model (turn signals) on craigslist for $200, it was rusted mess with large gaping holes in the floorboards, but something said I should bring this thing back to life.
Ended up with
A nice little piece of history that you can park anywhere in SF! The goal was not a perfect rebuild, but a super functional Vespa daily. I ditched the old 6v electronics and points for electronic ignition and 12v modern electronics that charge my iPhone, and run HID and LED lights and keep up with the added displacement of the 180cc engine. Also does not look too bad.
Restoration Gallery
From rust bucket to road-worthy Italian beauty
Before & After
Before


After


Engine Work


Restoration Process


Restoration Journey
From Rust to Ride
What started as a $200 rust bucket became a fully functional daily rider. This project taught me about Italian engineering, the beauty of simple mechanical systems, and the satisfaction of bringing something back to life with your own hands.
Complete frame restoration
Welded new metal, fixed rust holes, powder coating
Engine rebuild & upgrade
150cc to 180cc conversion, performance tuning
Modern electronics
6V to 12V conversion, LED/HID lighting, phone charging

Chapter 2 — 2025
Going electric
Sold the upgraded engine and fully funded the electric conversion — keeping the vintage look.
Role: Systems engineer, Electrical design, Fabrication
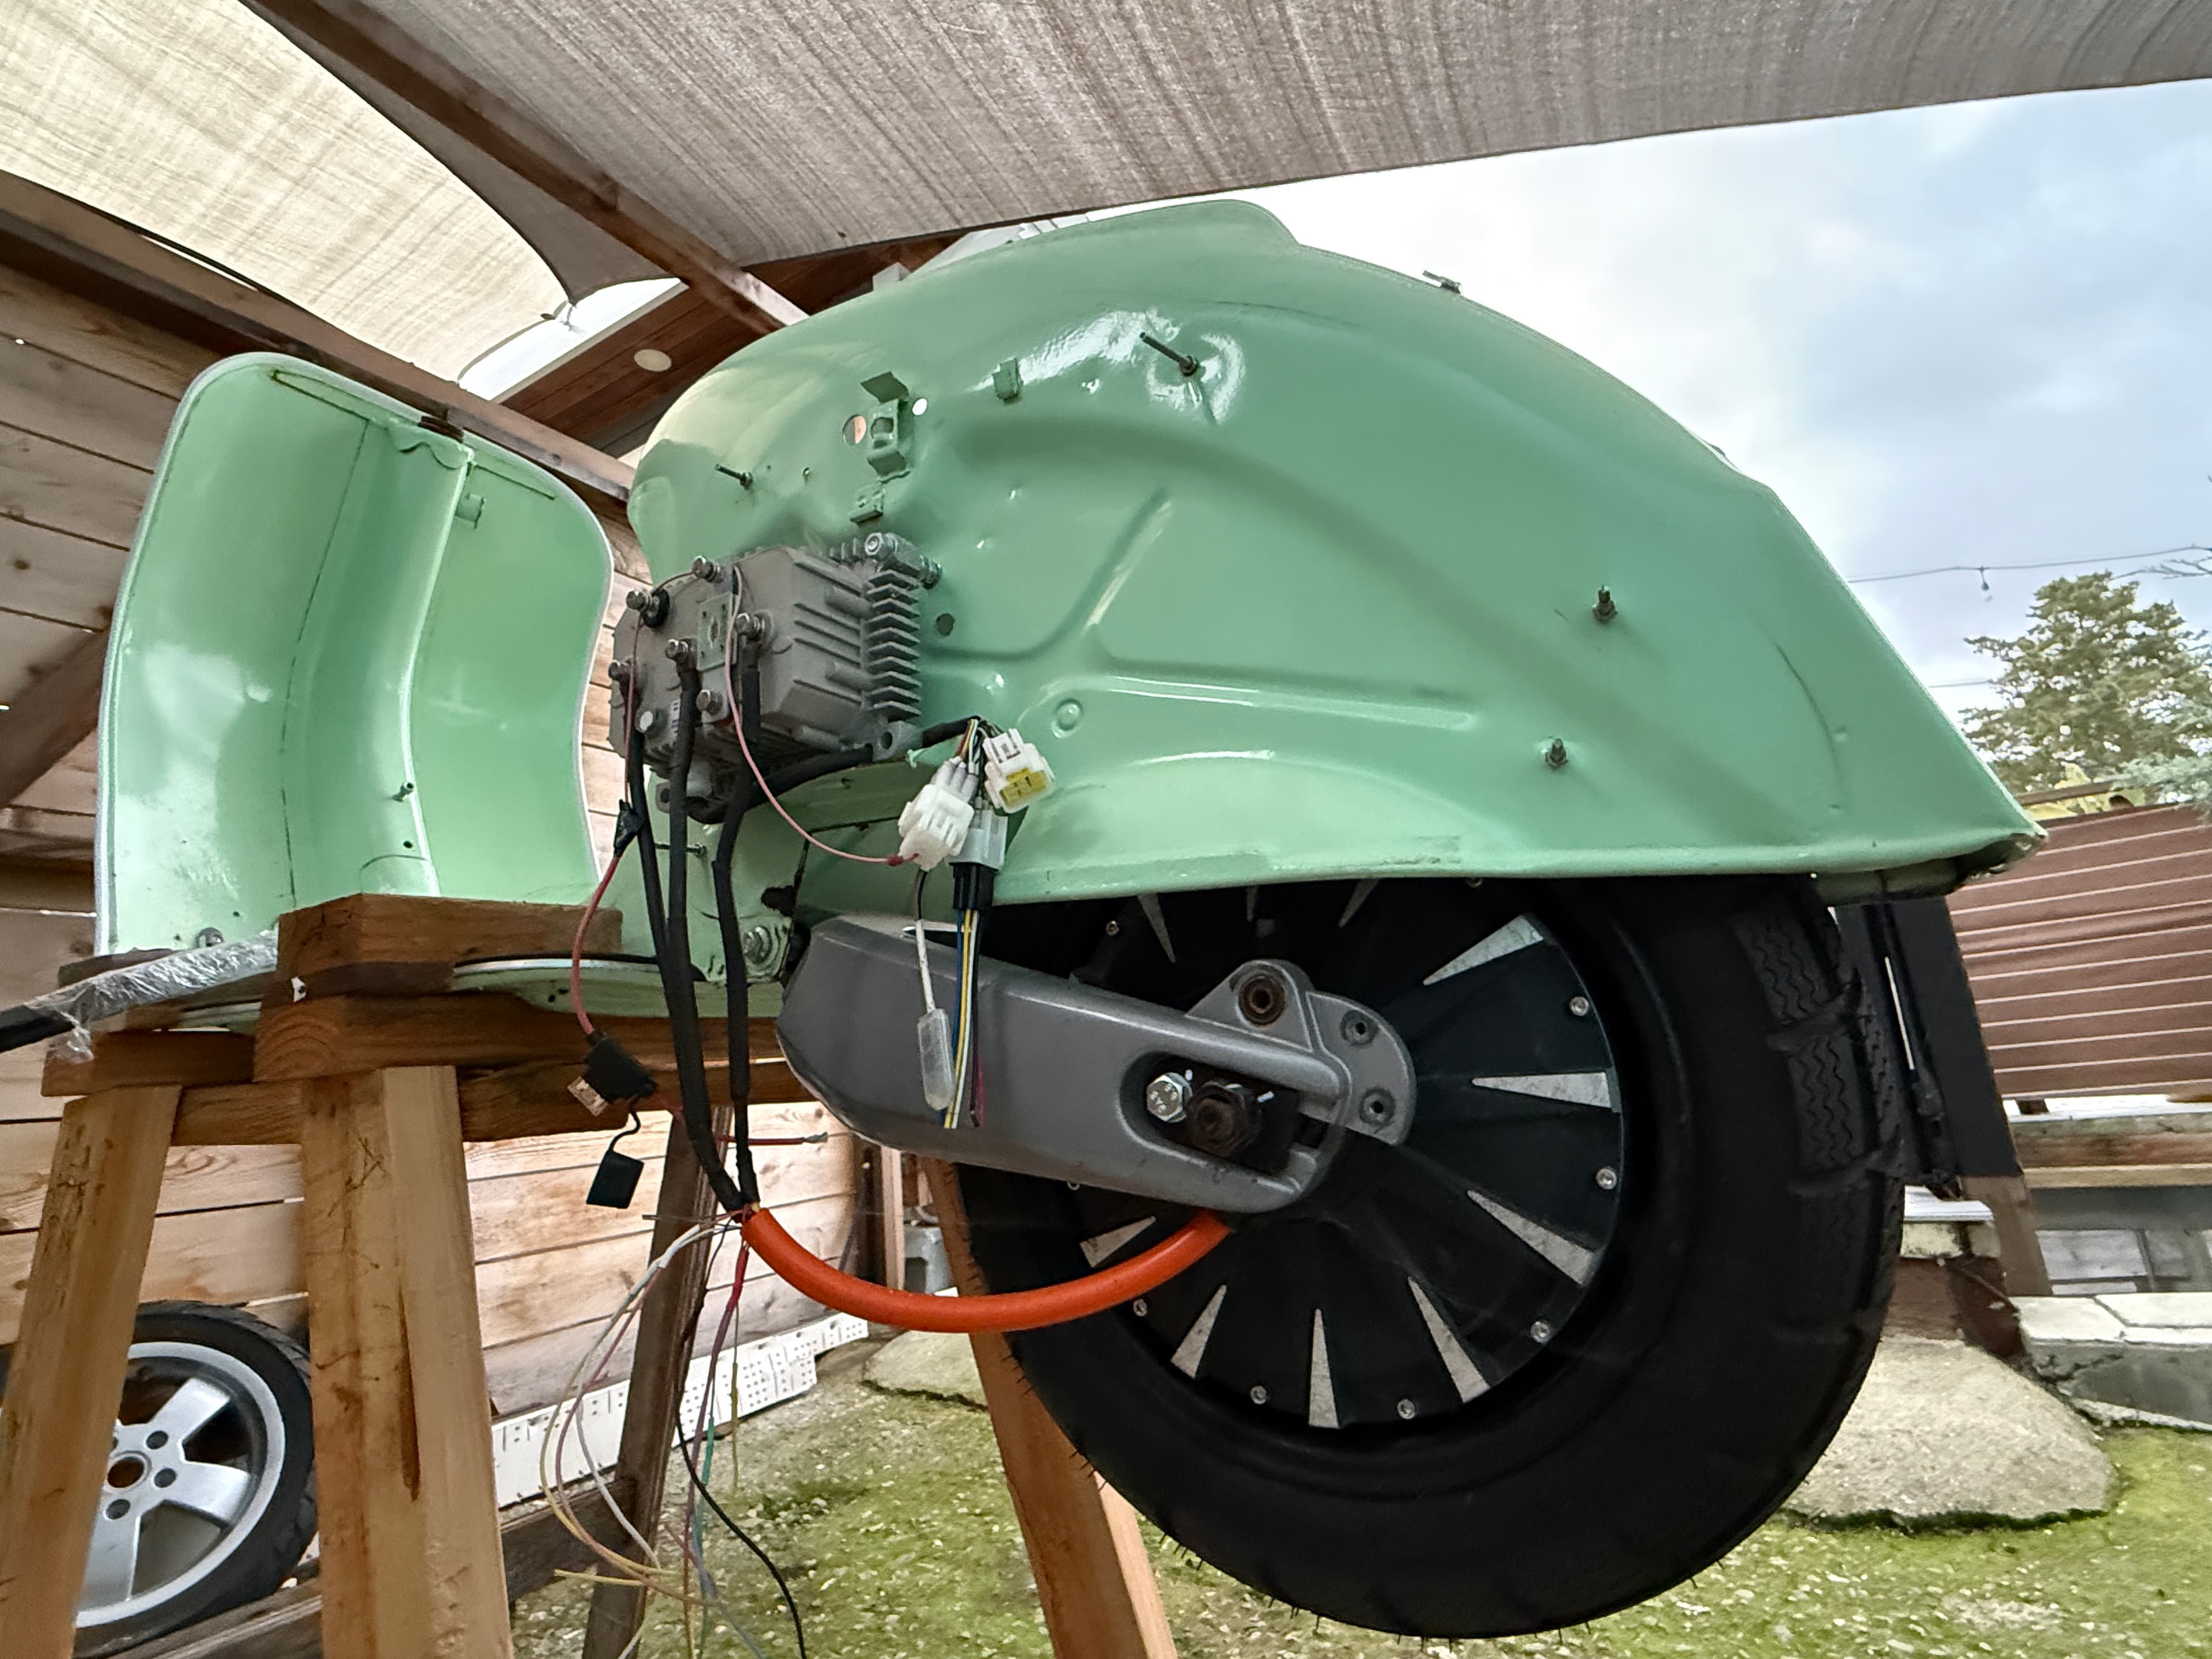
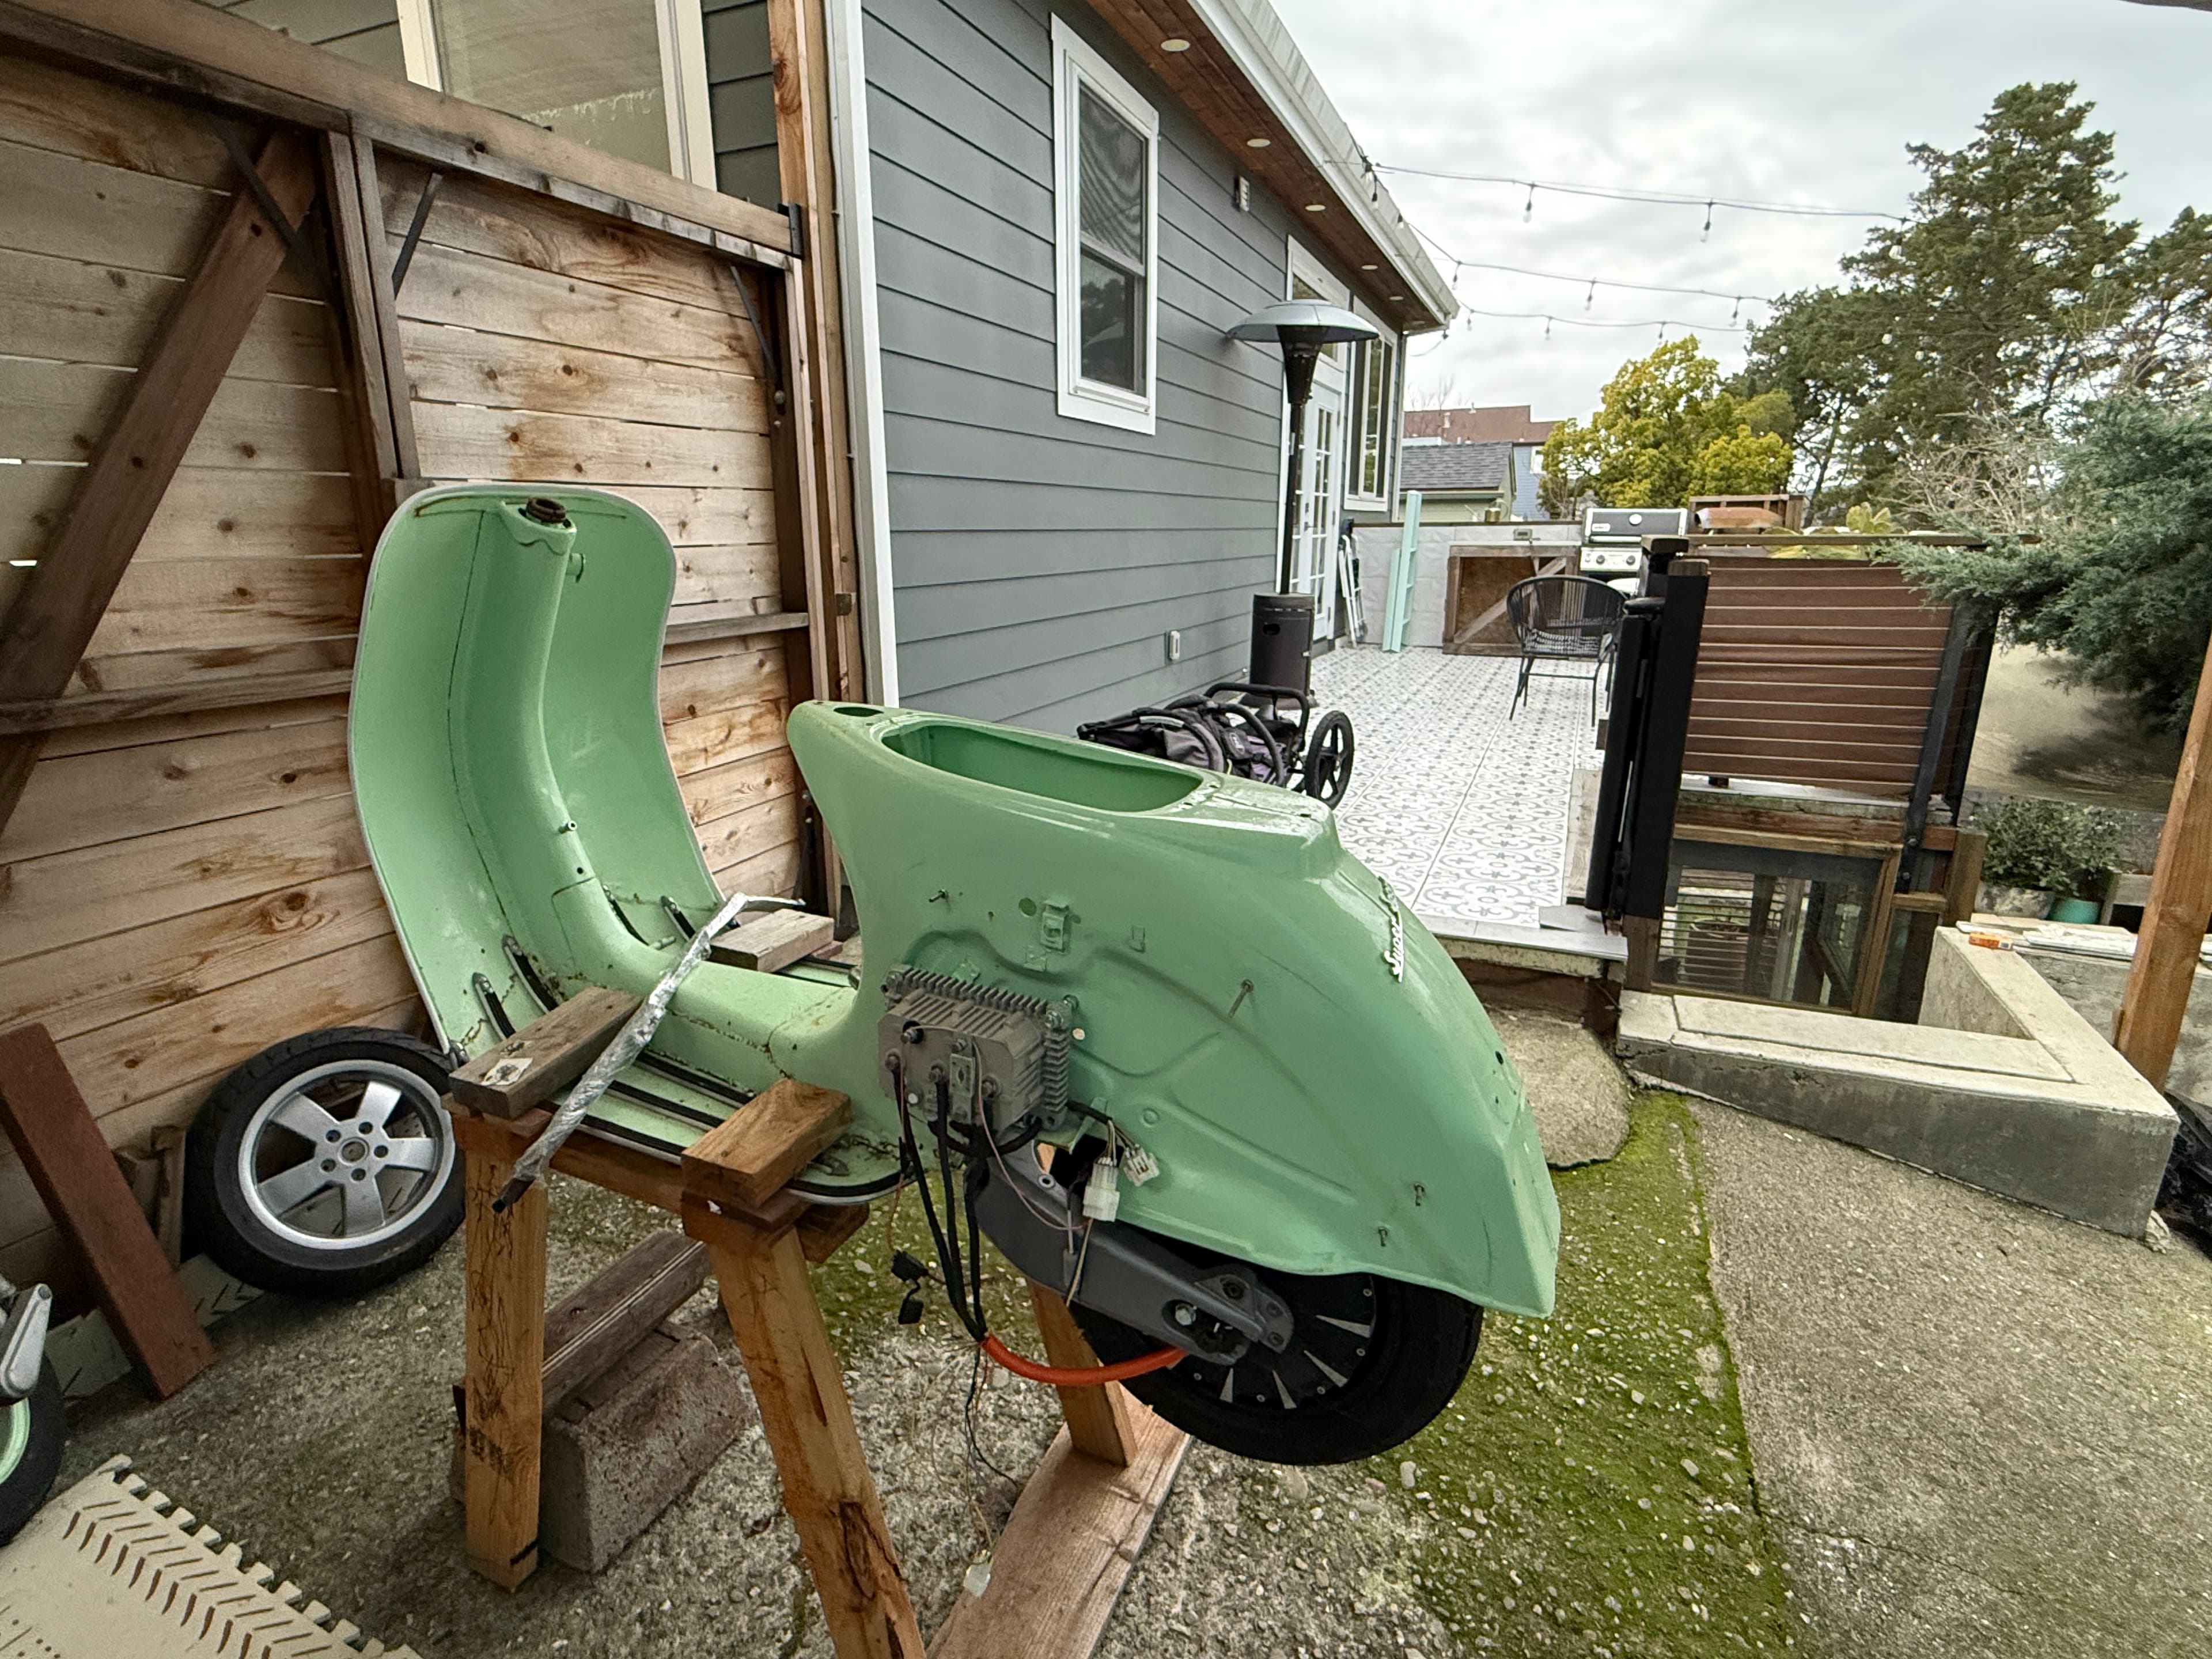
The Electric Conversion
A ground-up electric drivetrain conversion — currently in progress. Every component individually sourced, integrated, and wired from scratch. The rear drivetrain is installed: QS260 hub motor laced to a new swingarm, Kelly controller permanently mounted. Next up: cutting and welding a 2009 GTS front fork to upgrade to GTS front disc brakes and a 12″ performance wheel.
[01] THE BUILD
Every wire, every bolt, from scratch
Rather than an off-the-shelf kit, every component was individually sourced, integrated, and wired from the ground up. The result is on track to rival purpose-built electric scooters costing 3–5× more.
The drivetrain pairs a QS260 12-inch hub motor (2000W nominal, 3000W+ peak) with a Kelly KLS7218N sinusoidal controller (80A continuous, 220A peak). A 76V 24Ah lithium-ion pack delivers 88.2V at full charge — pushing both components 16% beyond typical 72V operation. The rear drivetrain is permanently installed: motor laced to a new swingarm, controller mounted and wired.
The front end is the next major fabrication milestone. A 2009 Vespa GTS front fork is being cut and welded to fit the vintage frame — upgrading from the original drum brake to GTS disc brakes and a 12″ performance wheel. This requires precise tube modification to match the original headset geometry while gaining modern stopping power.
The Kelly's sinusoidal drive means dead-silent operation. No whine, no vibration. The hub motor integrates invisibly into the rear wheel. From the outside, it still looks like a Vespa.
[02] THE INNOVATION
Dual DC-DC power management
The standout engineering challenge: the wireless control paradox. How do you power a wireless receiver when that receiver controls the main power? A single DC-DC converter after the contactor can't work — it needs the very power it's supposed to switch on.
The solution is a staged architecture that achieves zero parasitic drain while maintaining one-button wireless convenience.
Stage 01
Always listening
A small 72V→12V converter sits before the contactor, always powered when the master switch is on. Powers the wireless receiver and nothing else.
~30mA standbyStage 02
Remote activation
The QIACHIP wireless relay receives the remote signal and simultaneously fires the main contactor and key-switches the Pro Chaser.
50m rangeStage 03
Full power
The Pro Chaser DC-DC activates on demand — 360W of 12V power for lights, signals, horn, and all accessories. Zero draw when off.
30A / 360W[03] WIRING
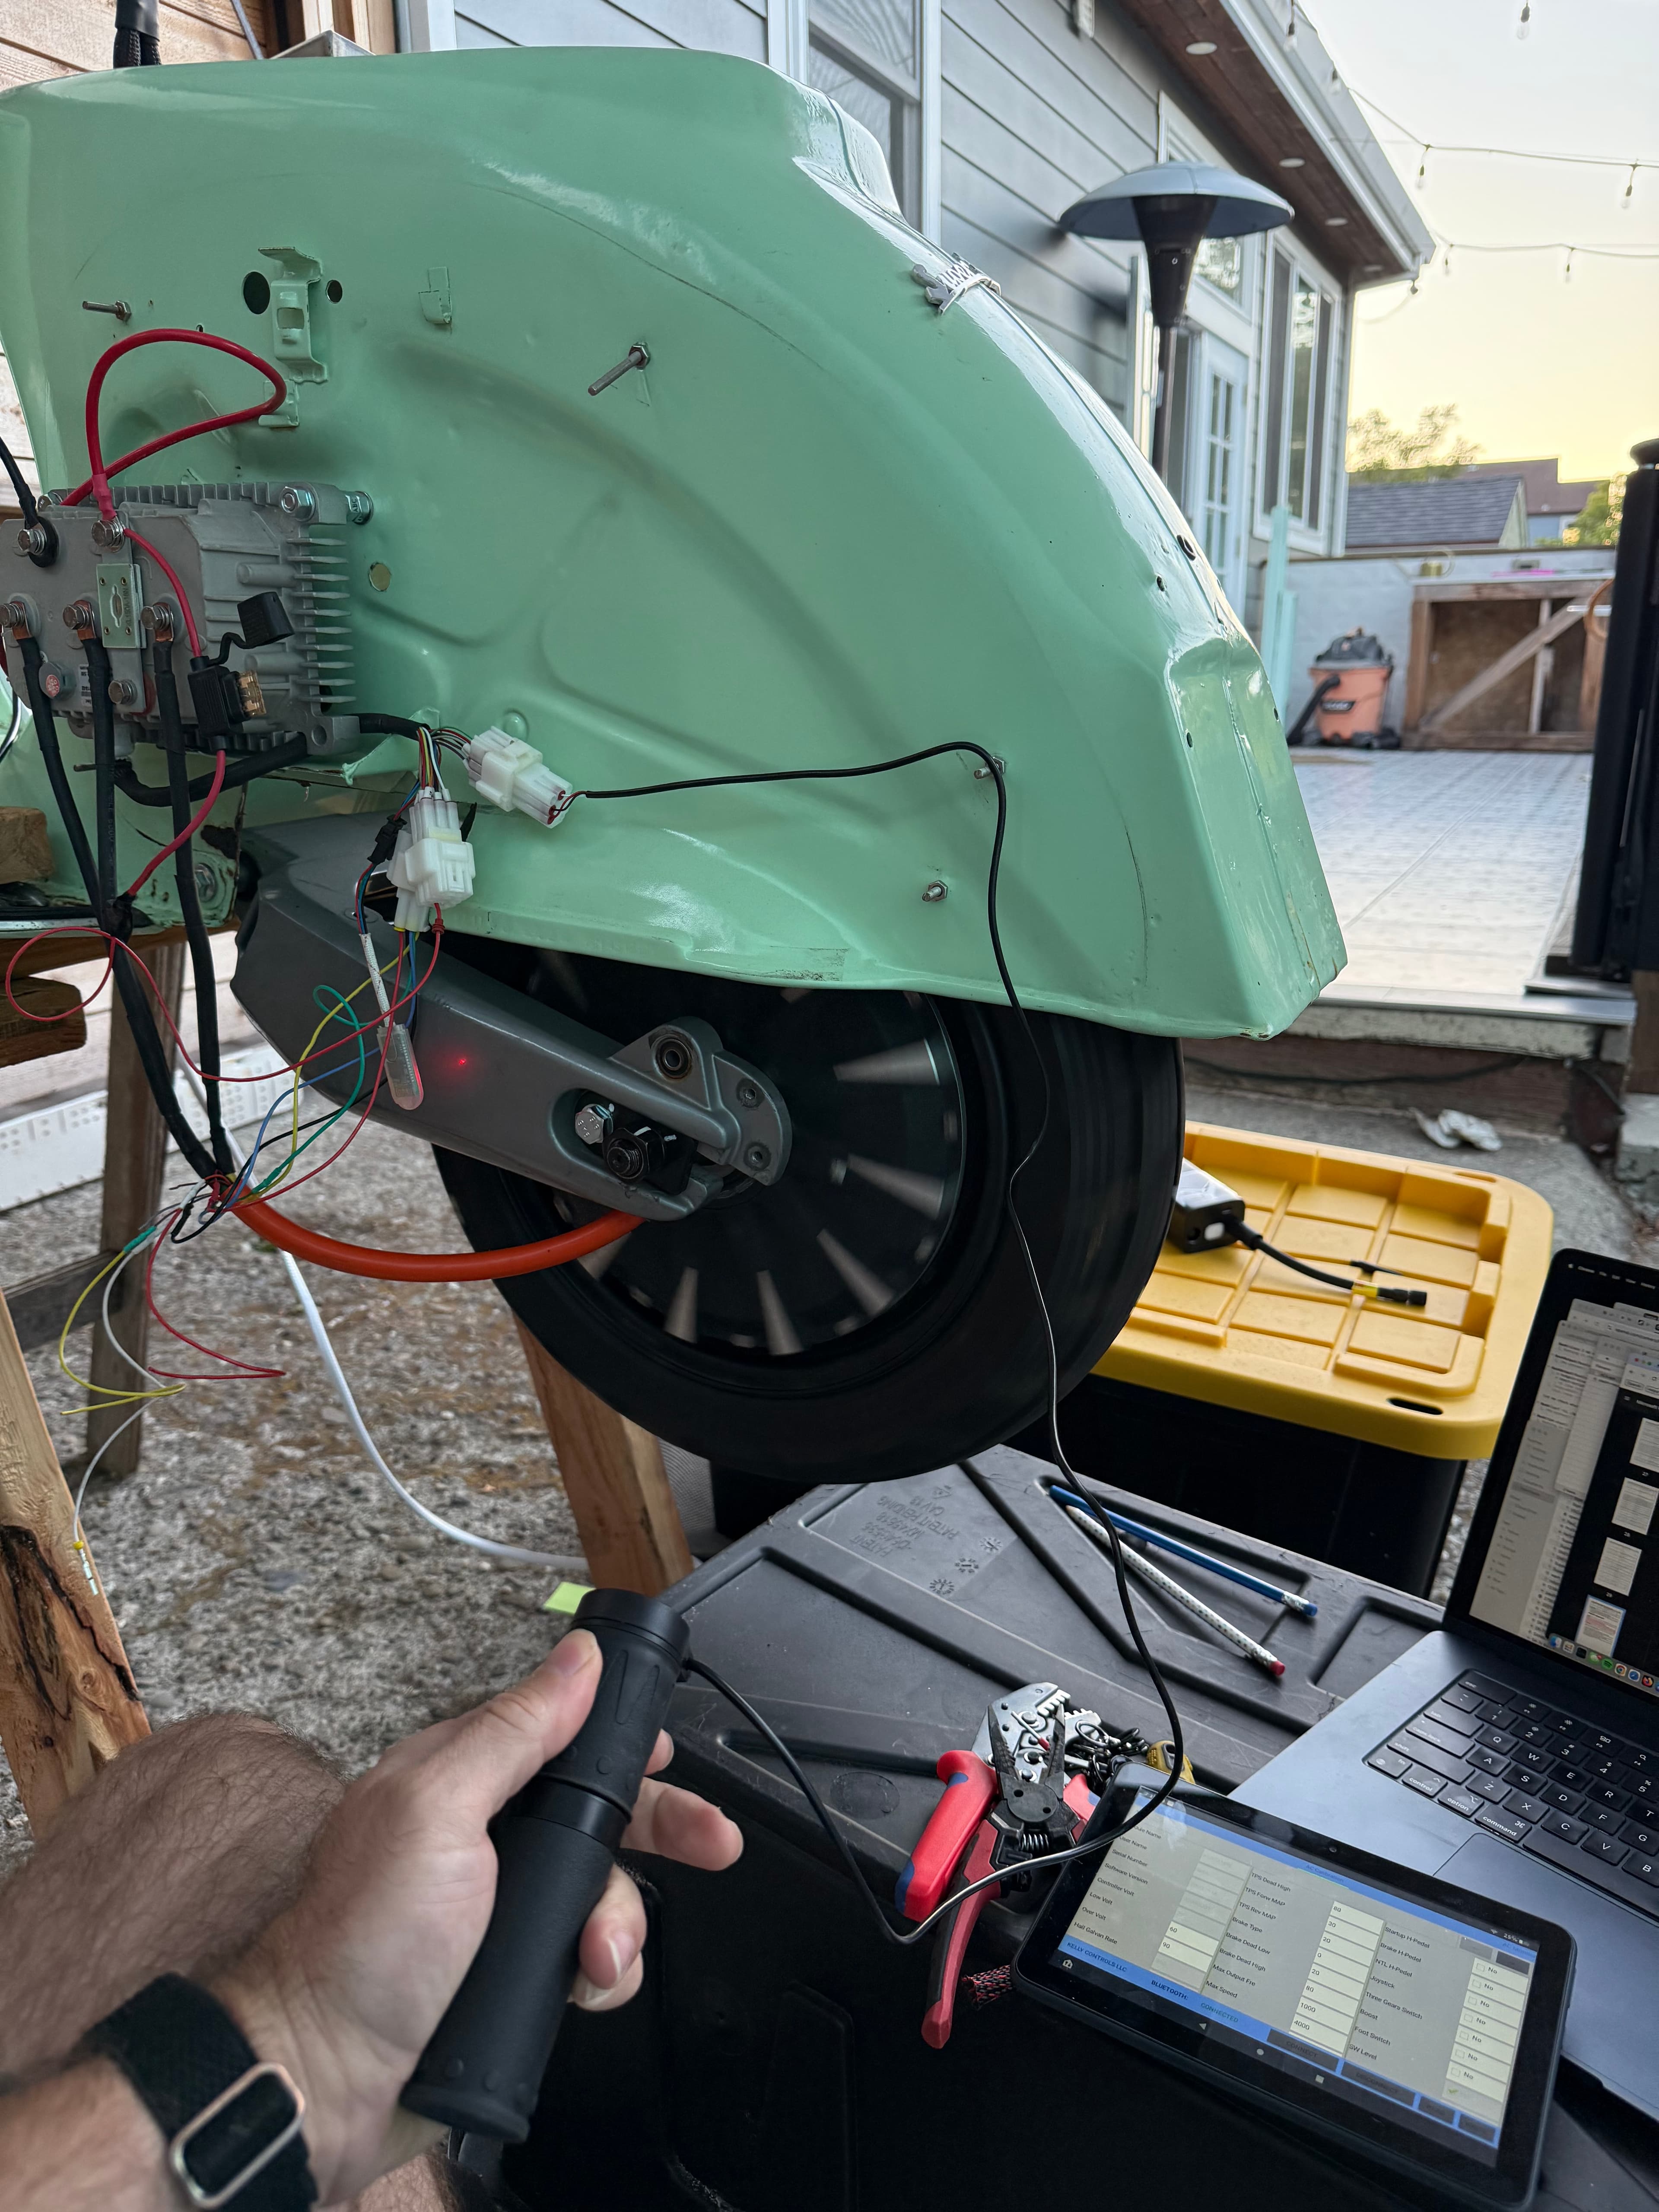
33 revisions to get it right
The complete wiring diagram evolved through 33 iterations — catching everything from the chicken-and-egg power paradox to correct QS260 hall sensor colors. Every wire gauge, pin number, and ground path verified against manufacturer documentation.
Complete system wiring v33 — main power, motor, ground & monitoring, dual DC-DC control, 12V distribution, lights, handlebar controls, throttle/brake, J1772 charging
[04] CHARGING
42 minutes to 80%
An onboard 76V/30A charger with a J1772 inlet connects to any Level 2 EV charging station. Empty to 80% in about 42 minutes. Full in roughly 65 minutes at a 1.25C rate. The charger came with the battery — one less thing to source.
In San Francisco's dense ChargePoint network, this will transform the Vespa from a neighborhood runabout into a genuinely practical daily commuter. A lunch stop adds 80% range. A coffee break adds another 15 miles.
[05] SPECIFICATIONS
Target system
Powertrain
Electrical
Charging
Controls
[06] HIGHLIGHTS
Why this build matters
- —55–60 mph — faster than most commercial electric scooters in this class
- —0–30 mph in ~3 seconds with aggressive controller tuning
- —Silent sinusoidal drive eliminates motor whine and vibration
- —88.2V max pushes components 16% beyond typical 72V operation
- —Dual DC-DC architecture solves the wireless control power paradox
- —Zero parasitic drain when master switch is off — true isolation
- —Staged activation: master arm → wireless ready → full system
- —Wiring diagram evolved through 33 revisions for accuracy
- —J1772 universal charging at any Level 2 station — 42 min to 80%
- —35–55 mile real-world range covers daily commuting with margin
- —Full motorcycle controls: turns, hi/lo beam, horn, hazard, brake
- —Real-time battery monitoring prevents range anxiety
- —~$1,200 total through strategic used component sourcing
- —60%+ savings vs. buying all components new
- —Rivals commercial electric scooters costing $4,000–$8,000
- —Near-zero operating cost — electricity only, no oil, no gas
[07] COST BREAKDOWN
The $1,200 build
Strategic used-component sourcing cut the total investment by over 60% without compromising performance.
| Component | Paid | New price |
|---|---|---|
| Kelly KLS7218N controller (used) | $100 | $400–500 |
| QS260 hub motor (used) | $100 | $300–400 |
| 76V 24Ah battery + charger (used) | $300 | $600–800 |
| Pro Chaser DC-DC 30A | $75 | $75 |
| Small DC-DC 10A | $50 | $50 |
| QIACHIP wireless module | $25 | $25 |
| EVC-500 contactor | $75 | $75 |
| Battery monitor + shunt | $50 | $50 |
| Handlebar controls | $75 | $75 |
| J1772 inlet + wiring | $50 | $50 |
| Wiring, fuses, connectors, misc. | $250 | $250 |
| Total | ~$1,150 | $1,950\u20132,350 |
[08] WHAT'S NEXT
Still building
In progress
GTS front fork conversion
Cut and weld a 2009 Vespa GTS front fork to fit the vintage frame. Upgrades to GTS disc brakes and a 12″ performance wheel for stopping power that matches the new electric drivetrain.
Wiring
Complete harness build
Build the full wiring harness from the v33 diagram. Dual DC-DC system, contactor, wireless remote, battery monitor, handlebar controls, and J1772 charging inlet.
First start
Controller tuning
Run the Kelly identification angle procedure with the QS260. Start conservative at 150A peak / 45 mph, then tune up from there.
Future
Regen, GPS, Bluetooth
Kelly supports regenerative braking — potential 10–15% range increase on SF hills. Then smartphone diagnostics and GPS anti-theft tracking.